Abrasive Blasting Medical Device Housings Before Anodizing and Protective Coating: Process Guide
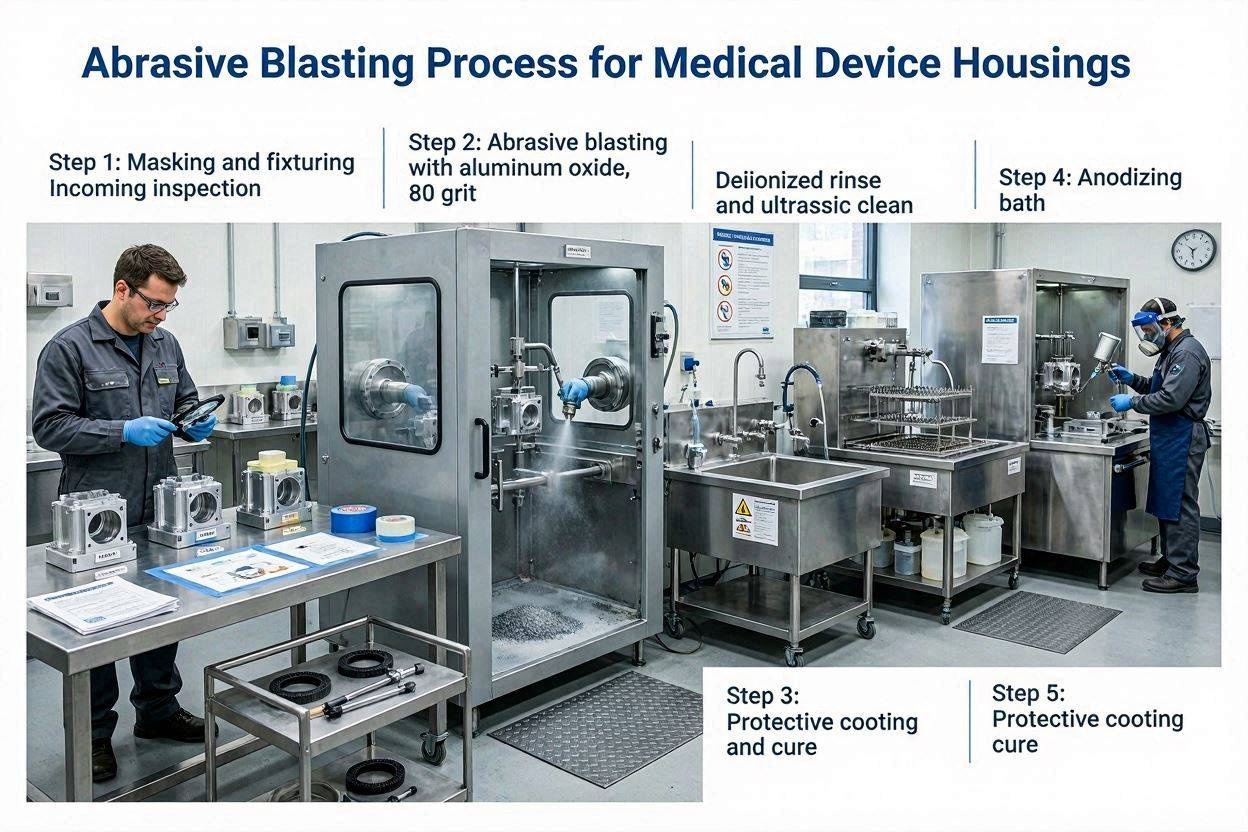
Medical equipment housings — the aluminum enclosures of MRI gantries, the stainless steel frames of patient monitoring systems, the structural bodies of surgical robots and infusion pumps — must withstand years of daily cleaning with aggressive disinfectants, resist impact and abrasion in clinical environments, maintain their appearance through hundreds of sterilization exposures, and present a professional, consistent finish that reflects the quality of the device they protect. Abrasive blasting is the surface preparation process that makes all of this possible: it removes the contamination and surface variation left by machining, creates the controlled topography needed for anodizing or coating to perform as specified, and produces the uniform matte aesthetic that medical equipment is expected to have. This guide covers the mechanics of pre-anodize and pre-coat blasting for both aluminum and stainless steel device housings.
1. Medical Device Housing Categories and Their Surface Requirements
Diagnostic Imaging Equipment
MRI scanner gantries, CT housing panels, ultrasound unit frames — large aluminum castings and machined panels. Type III hard anodize for durability; uniform matte appearance required across large surface areas.
Patient Monitoring Systems
Aluminum and polycarbonate housings. Metal components (handles, mounts, brackets) blasted and Type II anodized or powder coated for color coding and chemical resistance.
Infusion and Drug Delivery
Aluminum pump bodies, stainless steel mounting brackets. Blasted before anodize or epoxy coat. Chemical resistance to alcohol and quaternary ammonium disinfectants critical.
Surgical Robotics
Titanium and aluminum structural arms, stainless steel joint covers. Non-sterile components blasted and anodized; sterile components receive additional validated cleaning after blasting.
Lab and Diagnostic Instruments
Centrifuges, analyzers, hematology instruments — aluminum enclosures with Type II anodize or powder coat over blasted substrates.
Sterilization Equipment
Autoclave chambers, washer-disinfector housings — stainless steel with high-temperature, high-humidity corrosion resistance requirements. Blasted and passivated as a minimum.
2. Aluminum Alloy Housings: Blasting Before Anodizing
Aluminum anodizing — the electrochemical process that grows a controlled aluminum oxide layer on the surface of aluminum components — is the dominant surface treatment for aluminum medical device housings. It provides corrosion resistance, surface hardness improvement, a consistent aesthetic finish, and a porous layer that can accept organic dyes for color coding. The quality and consistency of the anodize layer depends critically on the condition of the aluminum surface entering the anodizing bath.
As-machined aluminum surfaces present multiple problems for anodizing. Machining operations leave a smeared surface layer — the Beilby layer — of heavily worked and alloyed aluminum that anodizes inconsistently compared to the underlying alloy. Cutting fluids, coolant residues, and tooling contamination are absorbed into this surface layer. Storage in air builds a native aluminum oxide film of inconsistent thickness (typically 2–10 nm) that anodizes unevenly. Handling leaves fingerprint contamination with oils and ionic compounds that appear as staining in the anodize layer.
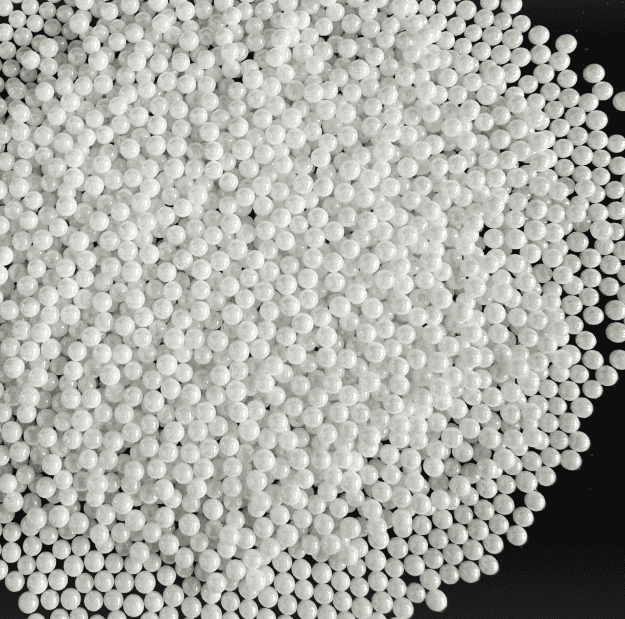
Glass bead blasting addresses all of these simultaneously. The mechanical impact of glass beads removes the Beilby layer and native oxide, lifting contamination and presenting a fresh, chemically active aluminum surface of consistent metallurgical character to the anodizing bath. The resulting anodize layer shows more uniform thickness across complex geometries, better adhesion on vertical surfaces and internal features, and fewer defects such as pitting, streaking, or uneven coloring than anodize applied to chemically etched-only surfaces on complex three-dimensional machined parts.
3. Anodize Types and Their Pre-Blast Surface Requirements
| Anodize Type (MIL-A-8625) | 过程 | Thickness | Pre-Blast Ra Target | Medical Application |
|---|---|---|---|---|
| Type I — Chromic Acid | Chromic acid bath; thin film | 0.5–2.5 μm | 0.4–1.0 μm | Rarely used (Cr VI concerns); some defense-adjacent medical devices |
| Type II — Sulfuric Acid | Sulfuric acid bath; moderate film | 5–25 μm | 0.8–1.8 μm | Standard for medical equipment housings; accepts dye; most common |
| Type III — Hard Anodize | Sulfuric acid, low temp; thick, dense film | 25–75 μm | 1.0–2.0 μm | Wear-resistant housings; imaging equipment gantries; robotic arm surfaces |
| Color Anodize (Ti, not MIL-A-8625) | Voltage-controlled TiO₂ thickness on titanium | 10–150 nm | 0.5–1.5 μm | Pacemaker/ICD identification; implant component coding |
For Type III hard anodize specifically, the pre-blast surface condition is more critical than for Type II, because the thick anodize layer magnifies any surface irregularities in the substrate — defects, scratches, or contamination that are barely visible on a Type II anodized surface become pronounced in hard anodize. Consistent pre-blast Ra and complete removal of machining marks is therefore more important for Type III applications. The harder, denser Type III anodize is used on surfaces that experience mechanical wear — door hinges, sliding surfaces, equipment feet, robotic arm sections — and the thickness of the anodize layer (25–75 μm) grows partly into the substrate and partly above it, meaning the pre-blast surface Ra effectively decreases by approximately half in the final anodized state.
4. Stainless Steel Enclosures: Blasting Before Painting and Powder Coating
Stainless steel housings — frames, brackets, doors, and structural elements on surgical tables, sterilizers, and patient transport systems — require surface preparation before painting or powder coating for color identification, aesthetic finish, or enhanced chemical resistance beyond what passivation alone provides.
Glass bead blasting of stainless steel enclosure surfaces before painting creates the surface roughness (Ra 0.8–2.0 μm) needed for mechanical adhesion of primer and topcoat systems. Smooth or polished stainless steel surfaces have insufficient mechanical keying for reliable paint adhesion and are prone to coating delamination under thermal cycling and disinfectant exposure. Blasted stainless steel surfaces also respond better to phosphate or silane adhesion promotion primers applied before painting.
After blasting, stainless steel enclosure components are passivated per ASTM A967 (if the stainless surface is to remain exposed in areas adjacent to the coating) and then primed within the validated time window to prevent surface oxidation and contamination. Two-component epoxy or polyurethane primers followed by polyurethane topcoats are standard for medical equipment requiring resistance to hospital-grade disinfectants including chlorhexidine, hydrogen peroxide vapor, and aldehyde-based disinfectants.
5. Complex Geometry Challenges and Automated Blasting Solutions
Medical equipment housings are rarely simple flat panels. MRI scanner gantry sections, curved diagnostic equipment panels, robotic arm covers with internal channels, and mounting brackets with deep recesses all present blasting coverage challenges that simple hand-blasting or single-nozzle automated systems cannot reliably solve.
Three equipment approaches address complex housing geometries:
- Multi-axis CNC blasting: Robotic nozzle arms following programmed paths around complex three-dimensional housings, maintaining constant nozzle angle and distance. Ensures complete coverage of curved surfaces and eliminates shadowing. Most appropriate for high-value, geometrically complex housing components produced in moderate volumes.
- Tumble blasting in rotary barrels: Effective for smaller housing components (brackets, clips, covers under approximately 200 mm) that can be tumbled without part-to-part impact damage. High throughput; consistent coverage; lower per-part cost. Not suitable for large or fragile housing components.
- Airless wheel blasting: Centrifugal impeller blasting in a cabinet with conveyor or rotary table; effective for flat panels and sheet metal components. High throughput for large surface areas. Coverage uniformity depends on part positioning and fixture design.
6. Process Parameters and Surface Outcomes
| Substrate | Media | Pressure | Ra Achieved | Target Application |
|---|---|---|---|---|
| Aluminum 6061-T6 | Glass beads #10–#12 | 1.5–2.5 bar | 0.8–1.6 μm | Pre-Type II anodize; standard housing finish |
| Aluminum 6061-T6 | Glass beads #10 | 2.0–3.0 bar | 1.2–2.0 μm | Pre-Type III hard anodize |
| Aluminum 7075 | Glass beads #12 | 1.5–2.0 bar | 0.6–1.2 μm | Precision housing components; fine finish anodize |
| 304 / 316L SS | Glass beads #10–#12 | 2.0–3.0 bar | 0.8–1.6 μm | Pre-paint / pre-powder coat; matte finish |
| Titanium (housing) | Glass beads #12–#13 | 1.5–2.0 bar | 0.5–1.2 μm | Pre-color anodize; pacemaker cans; robotic components |
7. Quality Control and Inspection
Quality control for blasted medical device housings covers three areas: surface roughness verification, visual inspection for coverage uniformity and surface defects, and contamination testing before coating or anodizing.
Ra measurement: Representative surfaces of each production lot are measured by calibrated profilometry. For large housings, multiple measurement locations (minimum 3–5 per part per the sampling plan) across different surface orientations verify uniform coverage and consistent Ra across the part. Typical specification: Ra 0.8–2.0 μm for standard pre-anodize finish.
Visual inspection: Parts are inspected under adequate lighting for uniform matte coverage, absence of shiny unreblasted areas, absence of over-blast damage (dimensional deformation on thin walls), and absence of surface defects (dents, scratches, contamination) that would show through the transparent anodize layer. Aluminum parts are particularly sensitive to handling after blasting — finger contact recontaminates the activated surface and produces fingerprint staining in the anodize.
Water break test: A drop of deionized water applied to the blasted aluminum surface should spread into a continuous film (water break-free) rather than beading up. Water beading indicates contamination (oils, fingerprints) that will cause anodize adhesion failure. Parts failing the water break test return to cleaning before blasting.
8. Frequently Asked Questions
Blasting removes the inconsistent native oxide and machining contamination, presenting a uniformly active aluminum surface to the anodizing bath. This produces more consistent anodize layer thickness, adhesion, and appearance across complex geometries than chemical etching alone. The controlled Ra (0.8–2.0 μm) also provides mechanical keying for the anodize layer, improving adhesion particularly on vertical surfaces and internal features of machined parts.
Type II (sulfuric acid anodize, 5–25 μm) is standard for most medical equipment housings requiring corrosion resistance and a matte aesthetic finish. Type III (hard anodize, 25–75 μm) is specified for housings requiring wear resistance — imaging equipment gantries, robotic arm sections, high-use contact surfaces. Type II anodize accepts organic dyes for color identification coding.
Glass beads in the #10 to #12 range (74–177 μm) at 1.5–2.5 bar are standard for pre-anodize surface preparation of aluminum. This produces Ra 0.8–1.8 μm that anodizes uniformly without excessive texture. Finer media (#13) at lower pressure is used for decorative fine-finish applications. Coarser media or higher pressure is used for pre-Type III hard anodize preparation where Ra 1.2–2.0 μm is targeted.
Yes. Glass bead blasting of stainless steel enclosures creates Ra 0.8–1.6 μm for matte finish and mechanical paint/powder coat adhesion. Blasting is followed by passivation per ASTM A967 and then priming within the validated window. Two-component epoxy or polyurethane systems over blasted stainless steel provide excellent resistance to hospital disinfectants including hydrogen peroxide vapor and chlorine-based cleaners.
The anodize layer is transparent and follows the underlying substrate texture exactly. Fine glass bead blasting produces a uniform fine-grained matte appearance after anodizing, free of machining marks and handling scratches. Coarser blasting produces a more pronounced matte; finer produces a satin appearance. The blasting step, not the anodizing chemistry, determines the final visual character of the housing surface.
Source Glass Beads for Medical Device Housing Blasting
Jiangsu Henglihong Technology supplies glass beads in pre-anodize and matte-finish grades for medical equipment housing manufacturers, with particle size distribution data and purity certificates for supply chain documentation.
Request Grade Data & Quote过滤器