Organic Abrasive Media for Dental Instruments: Walnut Shell, Corn Cob, and More
What Are Organic Abrasive Media and How They Differ
Organic abrasive media are granular materials sourced from plant matter—nut shells, fruit pits, ground cobs, and hardwood—that perform light abrasive work without the hardness or cutting aggression of aluminum oxide, silicon carbide, or glass bead. In dental instrument finishing, they fill a narrow but important role: they clean, dry, buff, and lightly deburr without altering delicate surface geometry.
The fundamental difference comes down to hardness. Where aluminum oxide sits around 9 on the Mohs scale and silicon carbide around 9.5, organic media hover between 2 and 4. That gap is everything. It means organics abrade soft contaminants and residual compounds rather than the underlying metal. For a stainless steel dental scaler or a hinged forceps joint, that distinction determines whether a finishing step refines the instrument or quietly damages it.
I divide organic media into two functional categories: absorbents y light abrasives. Corn cob and certain wood flours lean heavily absorbent—they wick moisture, oil, and compound residue off instrument surfaces. Walnut shell and apricot pit carry more abrasive character, enough to knock off light oxidation, buff away tarnish, or smooth subtle surface irregularities from prior machining steps. The distinction matters when you’re building a multi-stage finishing sequence, because putting an absorbent where you need abrasion just extends cycle time without delivering results.
Another differentiator: organic media are biodegradable and typically produced as byproducts of food agriculture. That gives them a sustainability profile that ceramic or plastic media cannot match. But it also introduces variables—moisture content, friability, and particle size distribution—that are less tightly controlled than with engineered synthetics. You learn to work with these variables rather than against them.
If you need the full picture of how organic media fit alongside ceramic, plastic, glass, and metallic options across the entire dental instrument finishing workflow, I recommend starting with the Complete Guide to Abrasive Media for Dental Instrument Finishing. It lays out the landscape so you can make informed decisions about where each media type belongs—and where it does not.
Walnut Shell Grit: Properties and Dental Polishing Uses
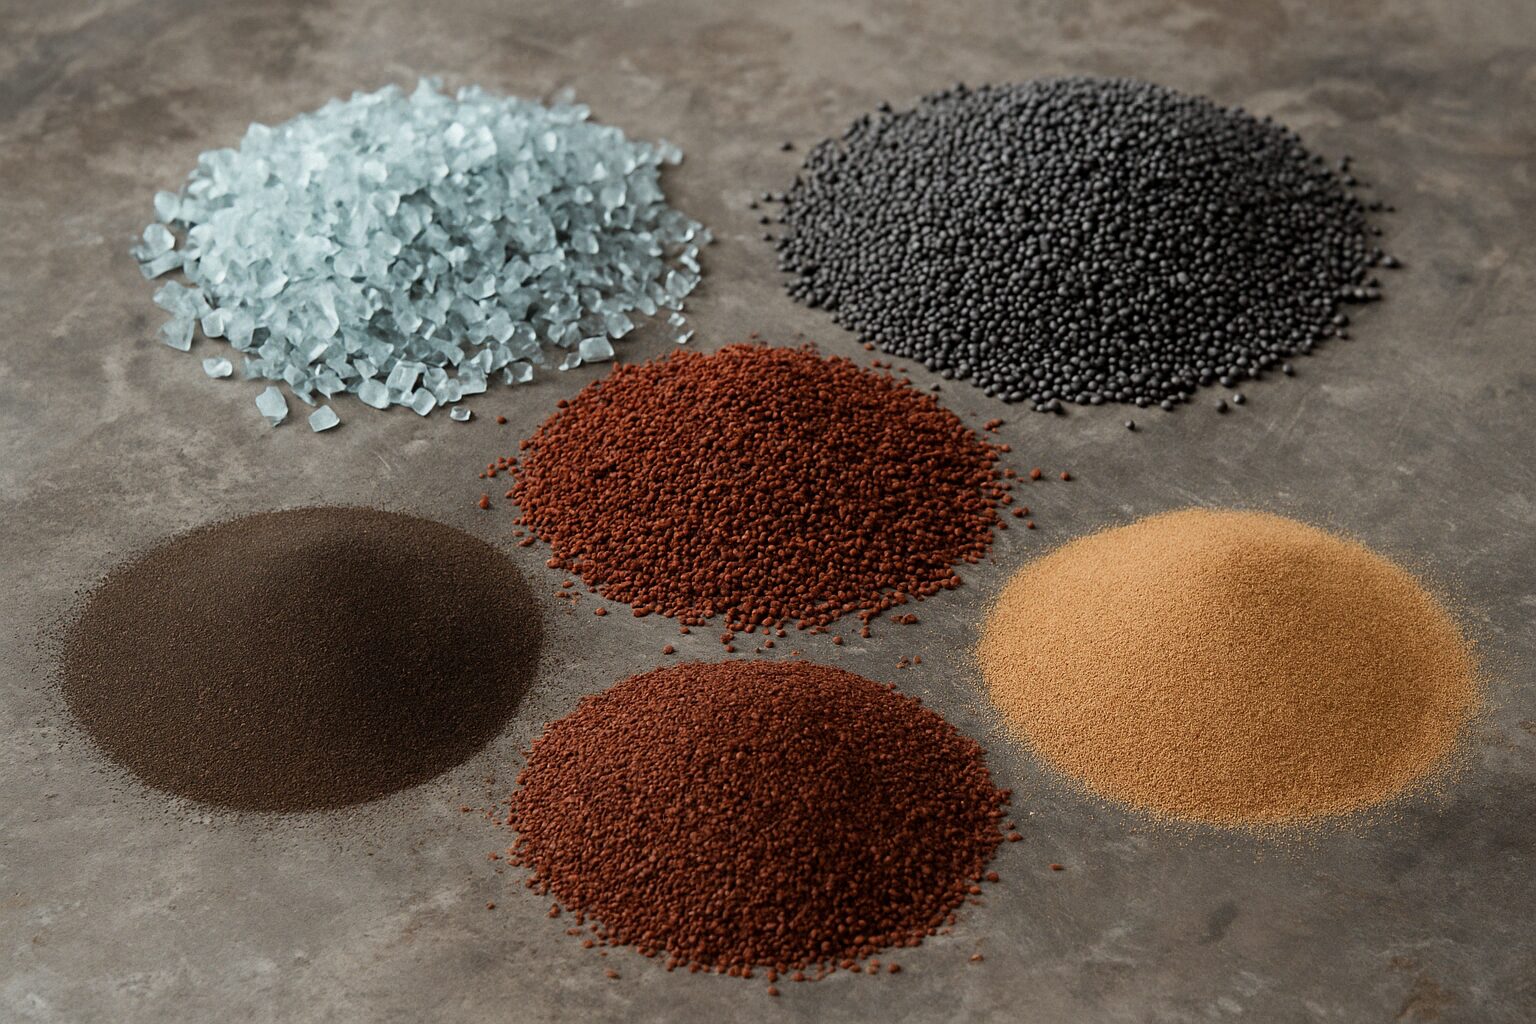
Walnut shell is the workhorse of the organic abrasive category. It is produced by crushing English walnut or black walnut shells into angular particles, then grading them into specific mesh ranges. The resulting grit is moderately hard (roughly 2.5 to 3.5 Mohs), brown to tan in color, and has a blocky, irregular fracture pattern that provides mild cutting edges without sharp points.
What makes walnut shell effective for dental instruments
The particle geometry is what sets walnut shell apart from softer organics. Each granule has multiple low-relief edges that scour rather than gouge. When tumbled against stainless steel dental instruments—elevators, explorers, scalers, extraction forceps—the action removes light surface contamination, water spots, and residual polishing compound without rolling edges or flattening fine tips. I have seen walnut shell bring a tray of used diagnostic explorers from dull-gray to a clean satin finish in under 90 minutes, with no measurable loss of tip sharpness under 10× magnification.
Walnut shell works particularly well in vibratory bowls and rotary tumblers at moderate speeds. The media flows easily around complex geometries—hinged joints, serrated tips, and narrow shanks—because the particles are lightweight and do not pack or wedge the way heavier ceramic chips can.
Grit size selection for different dental finishing stages
The mesh size you pick determines how aggressive the action is and how fine the resulting surface will be. Here is what I use as a practical guide:
- Coarse (20/40 mesh): Reserved for heavy pre-cleaning of visibly tarnished or oxidation-stained instruments. Removes light rust spotting. Too aggressive for routine use on fine-working tips. Cycle times typically 45 to 75 minutes.
- Medium (40/60 mesh): The sweet spot for general dental instrument refurbishment. Removes compound residue, light staining, and handling marks. Produces a clean, uniform satin finish. Cycle times around 60 to 90 minutes in vibratory equipment.
- Fine (60/100 mesh): Used for final buffing and surface refinement. Produces a smoother, lower-Ra finish. Often used as a bridge step before final passivation or electropolishing. Cycle times extend to 90 to 120 minutes.
- Extra-fine (100/200 mesh): Niche use for delicate microsurgical tips and high-luster pre-finish. Very low material removal. Primarily a surface-conditioning step.
When walnut shell is not the right choice
Walnut shell is not a deburring media. If instruments have sharp burrs from grinding or machining, walnut shell will not remove them effectively—it lacks the hardness and cutting speed. In those cases, you need a ceramic or plastic media step first, followed by walnut shell for cleanup and surface conditioning. Also, walnut shell can leave a faint brownish dust residue if not adequately cleaned off after processing; a post-tumble rinse in warm water with a mild detergent resolves this consistently.
Corn Cob Grit: Absorption and Gentle Finishing
Corn cob media is ground from the woody center of corn cobs after the kernels are removed. It is softer than walnut shell—around 2 to 2.5 Mohs—and has a more porous, spongy particle structure. That porosity is its defining feature: corn cob absorbs liquids, oils, and semi-solid residues far more aggressively than it abrades.
Why absorption matters in dental instrument processing
After ultrasonic cleaning or manual scrubbing, dental instruments often carry a thin film of moisture mixed with residual detergent or lubricant. If that film remains during heat sterilization, it can leave water spots or, worse, trap contaminants under a dried mineral layer. Corn cob media pulls that moisture out of hinge joints, serrations, and textured grips where cloth drying cannot reach.
I use corn cob as a drying step more than a finishing step. Instruments come out of the wash, get a quick shake or compressed-air blow-off, then go into a vibratory bowl with corn cob media for 30 to 45 minutes. What emerges is bone-dry, ready for inspection or direct packaging. This is especially useful for hinged instruments like forceps and needle holders where trapped moisture in the joint can cause corrosion during storage.
Corn cob with polishing compounds
Corn cob readily accepts liquid polishing compounds and rouge suspensions because of its absorbent structure. When pre-treated with a fine polishing compound and allowed to dry, corn cob becomes a gentle polishing carrier. The media itself does not cut—it presents the compound to the instrument surface. This technique is common for achieving a bright, reflective finish on stainless steel dental mirrors and scaler handles without risking dimensional change.
The tradeoff: compound-laden corn cob has a shorter usable life because the pores become saturated and the compound distribution becomes uneven. Expect to replace compound-treated corn cob every 4 to 7 cycles in continuous production.
Grit sizing and practical limits
Corn cob is typically available in mesh ranges from 10/14 (very coarse, fast-drying) down to 60/100 (fine, for polishing carrier use). For instrument drying, 20/40 mesh provides a good balance of surface contact and flowability around complex shapes. Avoid the coarsest grades on fine instruments—the larger cob particles can lodge momentarily in serrations and require extra rinsing to dislodge.
Other Organic Options: Apricot Pit, Wood Media, and Their Suitability
Apricot pit media
Apricot pit grit is ground from the hard endocarp of apricot stones. It sits at the harder end of the organic spectrum—closer to 3.5 to 4 Mohs—and has a sharper, more angular fracture than walnut shell. The particles are denser and more durable, which translates to longer media life and slightly higher cutting action.
For dental instruments, apricot pit fills a narrow gap: it handles light deburring and more aggressive cleaning than walnut shell can manage, without stepping up to ceramic. I have used it on stainless steel impression trays and orthodontic pliers where walnut shell was too slow but I wanted to avoid the surface roughness that ceramic media sometimes leaves behind. Typical cycle times run 45 to 70 minutes for cleaning applications.
The downside is cost and availability. Apricot pit media is less common and typically 20 to 40 percent more expensive than walnut shell per pound. It also generates slightly more dust during breakdown, so dust collection becomes more important.
Hardwood media (wood pegs, sawdust, and flour)
Wood-based media covers a wide range: hardwood pegs for tumbling, sawdust for absorption, and fine wood flour for very gentle polishing. For dental instruments, the most relevant form is hardwood pegs or cubes used in barrel tumbling for drying and light polishing of larger, robust instruments like impression trays, tray handles, and orthodontic pliers.
Wood media is very soft—typically under 2 Mohs—and acts almost purely as an absorbent carrier. It adds negligible abrasion. Its value is in drying and in distributing liquid polishing compounds evenly across instrument surfaces. Wood pegs also provide good cushioning, which helps when tumbling multiple instruments together to prevent metal-on-metal contact marks.
The main limitation: wood media splinters and breaks down faster than nut-shell media, generating fines that can pack into crevices. Screening or replacing media regularly is essential. For fine dental instruments with narrow lumens or tight hinges, wood media is generally a poor choice because of this splintering tendency.
| Tipo de medio | Dureza Mohs | Typical Mesh Range | Primary Action | Best Dental Use | Typical Cycle Time | Media Life Estimate | Key Risk |
|---|---|---|---|---|---|---|---|
| Walnut Shell | 2.5–3.5 | 20/40 to 100/200 | Light abrasive with mild cutting edges | General cleaning, satin finishing, pre-passivation conditioning | 60–90 min (vibratory) | 8–15 cycles | Rounded edges reduce cut rate over time; brown dust residue if not rinsed |
| Corn Cob | 2.0–2.5 | 10/14 to 60/100 | Absorbent carrier, very mild abrasive | Post-wash drying, compound carrier for bright polishing | 30–45 min (drying); 60–90 min (polish carrier) | 4–10 cycles (shorter if compound-treated) | Moisture saturation kills drying performance; particles lodge in serrations |
| Apricot Pit | 3.5–4.0 | 20/40 to 80/120 | Moderate abrasive with sharp angular particles | Stain removal, light deburring on trays and pliers, faster cleaning | 45–70 min | 12–20 cycles | Higher dust generation; more expensive per pound; can be too aggressive for fine tips |
| Hardwood (pegs/cubes) | Below 2.0 | Varies by peg size (typically 3–10 mm) | Absorbent cushion, negligible abrasion | Drying large robust instruments, compound distribution, preventing part-on-part contact | 40–60 min | 5–10 cycles | Splintering generates fines that pack into hinges; poor for delicate instruments |
Benefits: Eco-Friendly, Lightweight, and Low Aggression
The advantages of organic media are straightforward, and they come from the same root cause: these materials are softer than the metals they process.
Low risk of dimensional change
On dental instruments where edge geometry and tip profiles are functionally critical—scalers, curettes, explorers, and microsurgical forceps—organic media remove contaminants without measurably altering the underlying metal. I have measured tip radii on periodontal scalers before and after 90-minute walnut shell cycles and found variations within the noise floor of the measurement tool (under 2 microns). That kind of predictability is what you want when processing instruments that cost hundreds of dollars each and whose clinical performance depends on precise edge geometry.
Lightweight and equipment-friendly
Organic media weigh significantly less per unit volume than ceramic or steel media. A vibratory bowl rated for a certain weight of ceramic media can typically handle the same volume of organic media with less motor strain and lower energy consumption. This extends equipment life and reduces the risk of bowl fatigue. It also makes media changes faster and less physically demanding for operators—a practical consideration when you are changing media charges multiple times per shift.
Sustainability and disposal advantages
Walnut shell, corn cob, apricot pit, and wood media are agricultural byproducts. They are renewable, biodegradable, and free of the heavy metals or crystalline silica concerns that accompany some synthetic blasting media. Spent organic media can often be composted or disposed of through standard waste streams without hazardous-material handling, though you must verify local regulations and account for any metal fines accumulated during processing.
Lower cost per pound
Organic media are generally less expensive than engineered ceramic or plastic media. Bulk walnut shell runs in the range of roughly 1 to 3 dollars per pound depending on grade and quantity, while comparable ceramic media can cost 3 to 8 dollars per pound or more. For a shop processing hundreds of instruments weekly, that difference adds up. The shorter media life partially offsets the savings, but in light-duty applications where aggressive cutting is unnecessary, organics remain the more economical choice on a per-part-finished basis.
Limitations and Risk of Embedded Particles in Dental Instruments
Organic media are not a universal solution. Their softness, the very property that makes them safe for delicate surfaces, also imposes hard limits—and creates one problem worth taking seriously: particle embedment.
The embedment problem
Because organic particles are relatively soft and irregular, they can become mechanically lodged in narrow features under sustained tumbling pressure. Hinged joints, box locks, serrated tips, and threaded adjustments on dental instruments are all potential trap sites. A walnut shell fragment wedged into the hinge of a hemostat or needle holder is more than an annoyance—it can interfere with instrument function, retain moisture that promotes corrosion, and potentially dislodge during sterilization or clinical use.
I have retrieved small organic particles from forceps hinges post-tumbling often enough to treat this as an expected part of the workflow rather than a surprise. The fix is not to avoid organic media altogether—it is to add a dedicated inspection and cleaning step after tumbling. Compressed air at 60 to 80 psi directed into hinge joints, followed by a warm-water ultrasonic rinse for 3 to 5 minutes, clears nearly all embedded particles. For instruments with particularly tight joints, a fine nylon brush under magnification ensures nothing remains.
No real burr removal capability
If the instrument has a raised burr from grinding or a rolled edge from misuse, organic media will not remove it. The media simply lacks the hardness to cut metal. Attempting to use walnut shell or corn cob as a deburring step wastes cycle time and produces inconsistent results. Recognize organic media for what they are: surface conditioners, not stock removers.
Friability and dust
All organic media break down with use. The constant tumbling action fractures particles, generating fine dust that can coat equipment, work surfaces, and ventilation filters. Over time, excessive dust reduces media effectiveness (the fines cushion impact), creates a breathing hazard (though organic dust is less hazardous than silica, it is still particulate matter), and demands more frequent housekeeping. A dust collection system or at minimum a well-ventilated processing area is not optional for continuous production use.
Batch consistency concerns
Unlike engineered media produced to tight specifications, organic media are natural products. Mesh distribution, moisture content, and particle hardness vary between supplier lots and harvest seasons. A bag of 40/60 walnut shell from one supplier may behave differently than the same nominal grade from another. In a production environment, I recommend qualifying each new lot with a short test cycle on non-critical instruments before committing to full production batches. Document the cycle time, visual finish result, and any unusual residue so you have a baseline to compare against future lots.
Ideal Applications: Buffing, Drying, and Pre-Cleaning
After working with organic media across a range of dental instrument types, I have settled on a mental framework for where they belong—and where they do not. Here is how I map the applications.
Pre-cleaning and stain removal
Instruments coming out of clinical service often carry a mix of light corrosion, autoclave scale, and residual biofilm even after manual scrubbing. A walnut shell or apricot pit cycle at 40/60 mesh removes this surface layer quickly and uniformly. This step sits between initial cleaning and final sterilization or passivation—it is a surface-restoration step, not a substitute for proper cleaning. I run pre-cleaning cycles at 60 to 90 minutes, checking at the 45-minute mark to assess progress and adjust time as needed.
Post-wash drying with corn cob
Drying is where corn cob earns its keep. After ultrasonic washing and rinsing, instruments carry moisture that air-drying cannot fully remove from joints and textured surfaces in a reasonable time. A 30-minute corn cob cycle pulls that moisture out and leaves instruments ready for inspection, lubrication, or packaging. This step has measurably reduced the incidence of storage corrosion in hinged instruments at facilities I have worked with.
Final buffing and luster finishing
For instruments that require a bright, reflective finish—dental mirrors, scaler handles, certain orthodontic pliers—compound-treated corn cob or fine walnut shell provides a gentle final buff. This step follows any necessary abrasive finishing and precedes final cleaning. The media carries the polishing compound to the surface without adding scratches of its own. Typical cycle times run 60 to 120 minutes depending on the desired luster level and the starting surface condition.
Where I would not use organic media
- Heavy rust or scale removal—requires ceramic or steel media
- Sharp burr removal from machined or ground edges—requires ceramic or plastic abrasive media
- Instruments with internal lumens narrower than 1 mm—organic particles can pack inside and resist removal
- Any application where a validated, repeatable Ra surface finish specification must be met—organic media variability makes this difficult to certify
How to Prepare and Dispose of Organic Media Safely
Media preparation before first use
Fresh organic media often arrives with residual dust from the crushing and grading process. Running it straight out of the bag introduces that dust into your equipment and onto your instruments. I take a few minutes to pre-condition each new batch:
- Screening: Pass the media through a sieve one mesh size finer than the nominal grade to remove excess fines. For 40/60 walnut shell, a 70-mesh screen catches usable media and lets dust pass through.
- Pre-tumble: Run the media alone in the vibratory bowl or tumbler for 10 to 15 minutes with the dust collection system active. This knocks off loose surface dust before instruments go in.
- Moisture check: If the media feels damp or clumps when squeezed, spread it on a tray and air-dry for several hours. Damp media cuts poorly and promotes corrosion on steel instruments.
- Compound loading (if applicable): For corn cob used as a polishing carrier, add the liquid compound gradually while the media is tumbling alone. Allow 10 to 15 minutes of mixing for even distribution. Overloading creates a sticky mess; under-loading gives uneven polish. A ratio of roughly 2 to 3 fluid ounces of compound per pound of corn cob media is a reasonable starting point for general bright-polishing work.
Safe disposal practices
Spent organic media carry whatever was removed from the instruments—metal fines, polishing compound residue, trace cleaning chemicals, and possibly biological material if the instruments were not adequately pre-cleaned. Treat spent media as potentially contaminated industrial waste, not as harmless agricultural material.
For general disposal, collect spent media in sealed bags or containers, label them with the contents and approximate processing dates, and dispose through your facility’s industrial waste stream. If your processing includes instruments that contacted biological material, the media may require treatment as regulated medical waste—check with your facility’s infection control or compliance officer.
Extending media life between changes
You can stretch media life by periodically removing fines. Every 3 to 5 cycles, screen the media charge through an appropriate mesh to pull out broken-down particles. This restores some of the original cutting or absorption performance and delays the need for a full media change. The effort takes 10 to 15 minutes per screening and pays off in reduced media consumption over weeks of production.
Troubleshooting Common Organic Media Problems
Over years of running organic media in dental instrument finishing, certain problems recur predictably. Here is how I diagnose and resolve them.
| Problem Observed | Most Likely Root Cause | How to Verify | Corrective Action | Prevention for Next Batch |
|---|---|---|---|---|
| Particles lodged in hinge joints or serrations after cycle | Media mesh too coarse for instrument features; cycle time too long for the particle size | Inspect trapped particles under magnification; measure approximate particle size against instrument gap dimensions | Switch to one mesh grade finer; reduce cycle time by 20%; add post-cycle compressed-air blowout and brief ultrasonic rinse | Match mesh selection to smallest instrument feature in the batch; establish maximum cycle time limits per mesh grade |
| Instruments emerge with dull, hazy surface instead of clean satin finish | Media exhausted—particles rounded and ineffective; or excessive fines cushioning the action | Examine media under low magnification; look for rounded edges and high proportion of dust-sized particles | Screen media to remove fines; if particles are visibly rounded, replace media charge entirely | Track cycle count per media charge; screen every 3–5 cycles; set a replacement threshold based on cycle time drift |
| Instruments still damp after corn cob drying cycle | Media moisture-saturated; or incoming instruments carrying excessive water | Squeeze a handful of corn cob media—if it clumps or feels wet, it is saturated | Replace media charge; improve pre-tumble water removal with compressed air or extended drip time | Monitor media moisture weekly; rotate two media charges so one can air-dry while the other runs |
| Brownish residue on instruments after walnut shell cycle | Normal walnut shell dust adhering to surfaces; insufficient post-cycle cleaning | Wipe instrument with white cloth—brown transfer confirms residue | Add warm-water rinse with mild detergent after tumbling; consider a brief clean-water ultrasonic step | Standardize post-tumble cleaning protocol; do not rely on visual inspection alone for residue detection |
| Excessive dust accumulation on equipment and surrounding surfaces | Media breaking down faster than expected; dust collection inadequate for the volume | Check dust collector filter condition; measure airborne dust with a simple settle plate or optical counter | Increase dust collection airflow; replace media if breakdown is premature; screen media more frequently | Size dust collection to the largest media volume in use; replace filters on a fixed schedule, not just when visibly clogged |
| Inconsistent finish across instruments in the same batch | Uneven media-to-parts ratio; overloading the bowl; or mixed instrument sizes creating shielding effects | Observe media flow during operation—instruments should move freely through the media mass, not sit stationary | Reduce batch size; maintain media-to-parts volume ratio of at least 3:1; separate large and small instruments into different batches | Weigh or count instruments per batch; document the ratio that produces consistent results for each instrument type |
PREGUNTAS FRECUENTES
Can I mix walnut shell and corn cob in the same cycle?
Technically yes, but I do not recommend it for dental instruments. The two media have different densities and breakdown rates. They tend to stratify in the bowl rather than blending evenly, which produces inconsistent results. Run them separately for predictable outcomes.
How do I know when to stop a cycle—is there a visual cue?
For walnut shell cleaning, the instrument surface transitions from dull or stained to a uniform light satin appearance. Stop when the surface looks even under good lighting. If you keep running past that point, you are just wearing the media without additional benefit. For corn cob drying, the cue is tactile—instruments feel completely dry and slightly warm from friction. If any cool or damp spots remain, extend the cycle in 10-minute increments.
Does organic media leave any residue that could interfere with sterilization?
Properly cleaned instruments should show no visible residue after a post-tumble rinse. If residue persists, it is typically fine dust that a detergent wash removes. Sterilization efficacy is not compromised as long as instruments are visually clean before packaging—organic media residues are not fixatives and do not shield microorganisms from steam or chemical sterilants.
Are organic media suitable for titanium dental instruments?
Yes, with caution. Titanium is softer than stainless steel and more prone to surface embedding. Use only fine grades (60/100 or finer) and shorter cycle times—30 to 45 minutes maximum. Inspect carefully for embedded particles under magnification before accepting the batch.
What is the shelf life of unused organic media?
Dry, properly stored walnut shell and corn cob media remain usable for years. Keep them in sealed containers away from moisture and pests. If media absorbs humidity during storage, spread it out to dry before use—damp media performs poorly and risks corrosion on instruments.
Pre-Run Checklist for Organic Media in Dental Instrument Finishing
Before loading instruments
- Media screened for fines within last 5 cycles (or fresh charge prepared)
- Media moisture level checked—dry and free-flowing, not clumping
- Dust collection system running and filter within service interval
- Equipment bowl clean and free of cross-contamination from previous media type
- Correct mesh grade selected for the instrument type and desired finish
- Cycle timer set based on documented parameters for this media and instrument combination
- Instruments pre-cleaned—no visible blood, tissue, cement, or bulk debris
- Hinged instruments opened to allow media flow through joint area
- Batch size and media-to-parts ratio verified (minimum 3:1 media volume to parts volume)
After cycle completion
- Instruments inspected under good lighting for uniform surface finish
- Hinge joints and serrations checked for trapped particles—compressed air blowout performed
- Warm-water rinse or brief ultrasonic cleaning completed to remove residual dust
- Instruments dried and inspected for water spots or residue
- Media condition noted—excessive fines or rounded particles flagged for screening or replacement
- Cycle time and results documented for batch traceability
Bottom line from the bench: Organic abrasive media are not a shortcut. They are a specific tool for a specific set of finishing tasks—cleaning, drying, buffing, and light surface conditioning on dental instruments where preserving edge geometry matters more than speed. Used correctly, with attention to mesh selection, cycle time, and post-cycle cleaning, they deliver consistent, economical results. Ignore the embedment risk or push them into deburring applications they were never designed for, and they will create more problems than they solve. Respect the limits, and they earn their place in the workflow.
Filtros