How to Choose the Right Abrasive Media for Dental Instrument Finishing
If you’re standing in front of a vibratory bowl or a centrifugal disc machine trying to figure out which media will actually deliver the edge break, surface finish, and cycle time you need, you know the catalog numbers can be overwhelming. I’ve seen shops spend months testing the wrong shapes and blends simply because they didn’t nail down four fundamental variables upfront. This article walks through exactly how to pick the right abrasive media for dental instrument finishing — from scaler tips to implant drivers — and where the hidden cost traps usually live. For a broader context on media categories and chemistry, you may first want to read the Complete Guide to Abrasive Media for Dental Instrument Finishing — it covers the full taxonomy I reference throughout.
1. Key Variables in Media Selection: Material, Shape, Size, and Bond
Every media selection decision I make starts with four knobs. You can’t skip any of them and still end up with a predictable process. Here’s what each one controls, and how to set them for dental work.
Material: Ceramic vs. Plastic vs. Organic
For dental instruments, the workhorse materials are ceramic and plastic. Organic media (walnut shell, corn cob) have their place in drying or ultra-fine polishing, but they won’t carry an abrasive load for breaking edges or blending tool marks.
- セラミック・メディア — heavy, dense, aggressive cutting action. Works best on stainless steel and titanium when you need to remove machining lines or burrs fast. The abrasive is usually fused into the body, so it keeps cutting as it wears. I lean on ceramic when surface roughness needs to drop from 1.6 µm Ra down to 0.4 µm Ra in a single step.
- プラスチックメディア — lighter, softer, less aggressive. I use polyester or urea-based plastics for PEEK instruments and for final pre-polish steps on titanium where I want to avoid any chance of iron contamination. Plastic media also runs quieter and is gentler on delicate geometries like hinged forceps.
- Organic media — used sparingly. I’ll spec a fine walnut shell blend only when we absolutely need to burnish a mirror surface without cutting further.
Shape and Size: Why It Matters for Dental Geometry
Dental instruments pack complex features into small volumes — narrow jaws, serrations, lumens, and thin shafts. The wrong shape will lodge in a corner or round over a critical edge. I follow a simple rule: match the media’s smallest dimension to the tightest cavity, then go smaller by 20% for safe access.
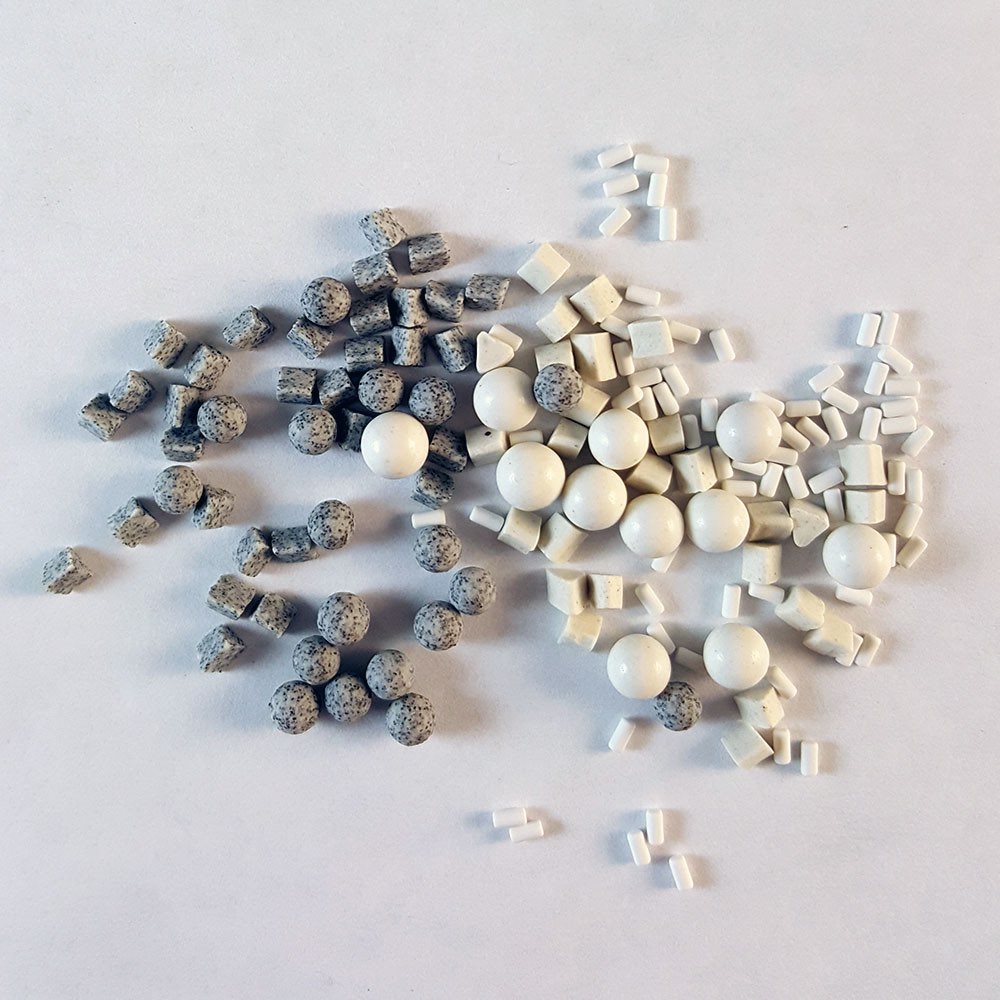
- Cones and triangles: best for reaching into grooves and serrations on forceps and needle holders. The pointed tips break edges without destroying functional grip patterns.
- Wedges and angle-cut cylinders: deliver a balance of cutting speed and radius control. I use these on scaler shanks where I need linear scratch patterns, not random pits.
- Spheres and ovals: reserved for surface smoothing on implant components — think healing abutments and cover screws that must have a uniform, soft reflective finish.
- Size range: For most hand instruments, I stay between 3 mm and 12 mm. Implant parts with internal hex drives may need media down to 1.5 mm to avoid bridging inside the connection.
Bond Type and Abrasive Grit Load
Ceramic media use a vitrified or resin bond. Vitrified bonds wear slowly and maintain grit exposure longer — ideal for aggressive cutdown cycles. Resin-bonded ceramics cushion the part, which helps when finishing thin cross-sections. Plastic media almost always use a resin bond with aluminum oxide or silicon carbide abrasive dispersed through the matrix. The bond hardness relative to the workpiece determines whether you’re cutting the part or just polishing the surface. I’ll come back to this when we match media to instrument materials.
2. Matching Media to Dental Instrument Materials: Titanium, Stainless Steel, and PEEK
Put titanium, 300-series stainless, and PEEK in the same vibratory bowl with one media blend and you’ll ruin at least two of them. Each substrate demands its own surface chemistry and mechanical interaction.
Titanium (Ti-6Al-4V and commercially pure)
Titanium galls easily, work-hardens under high-impact media, and is sensitive to iron contamination. I never use standard ceramic media that contains iron oxide pigment — it can transfer to the surface and create corrosion sites. Instead, I spec high-purity aluminum-oxide ceramic media or plastic media loaded with silicon carbide. Keep impact energy moderate: centrifugal machines at low RPM, or vibratory bowls with gentle amplitude. A 6 mm angle-cut cylinder in plastic with fine grit will remove machining marks without smearing the surface.
Stainless Steel (304, 316, 17-4 PH)
Stainless instruments like scalers and forceps are forgiving but prone to orange-peel texture if you over-cut. I run ceramic media with a fused aluminum-oxide grit here, medium bond, 8–10 mm triangles for initial deburring, then transition to smaller 4 mm cones for finishing. Watch out for embedded media particles — a post-finish passivation step is non-negotiable. Plastic media is too slow for high-volume stainless if your Ra target is below 0.2 µm; ceramic earns its keep.
PEEK (Polyether ether ketone)
PEEK components — like implant healing caps or surgical guides — need a completely different approach. Heat buildup from aggressive ceramic will glaze the surface. I use light plastic media with fine aluminum-oxide grit, 4–6 mm ovals or cylinders, and short cycle times with frequent coolant flushes. Never use silicon carbide media on PEEK if you plan to sterilize it later; residual SiC particles can embed and cause micro-abrasion during autoclave cycling.
3. Surface Finish Requirements: Ra Values and Cosmetic Targets
Numbers matter here, but they’re not the whole story. I’ve had operators chase a 0.1 µm Ra on a scaler handle back only to get rejected because the finish looked “cloudy” under 10x magnification. Cosmetics count in dental — instruments must look clean and professional, not just measure smooth.
Typical Ra Targets by Instrument Type
| Instrument Type | Function Zone | Typical Ra Target (µm) | Finish Appearance |
|---|---|---|---|
| Scalers & Curettes | Working tip and shank | ≤ 0.2 µm | Bright, smooth, no visible scratch lines |
| Forceps & Hemostats | Jaws and box locks | 0.4–0.6 µm | Semi-bright, matte acceptable in grip areas |
| Needle Holders | Jaw inserts & body | 0.3–0.5 µm | Consistent satin, no directional lay |
| Implant Abutments | Transmucosal surface | ≤ 0.1 µm | Mirror-bright, defect-free under 20x |
| PEEK Healing Caps | Outer contour | 0.4–0.8 µm | Matte to low-sheen, uniform |
When a profilometer isn’t practical on the floor, I rely on visual standards — polished titanium coupons with certified Ra values — and teach operators to compare under a consistent light source. If a part passes the light-box test but still shows faint directional lines, the media shape or flow pattern likely needs adjustment, not just more cycle time.
Practitioner tip: A glossy finish with a high Ra reading usually means plateau polishing — the peaks are flattened but valleys remain. That’s a sign you need a two-step sequence: cut with a harder media to remove material uniformly, then polish with a softer media to remove the remaining peaks.
4. Considering Production Volume and Desired Cycle Times
Media selection isn’t just about surface quality; it’s about how many parts you push through per shift. I’ve seen labs use a single-step ceramic process on 5,000 scalers per week — and then wonder why 30% come out with edge rounding that fails QC. Volume dictates the processing philosophy.
Batch Size vs. Media-to-Part Ratio
For vibratory finishing, a 3:1 media-to-part ratio by volume is the starting point. Centrifugal barrels can go as low as 1.5:1 because the higher energy compresses the load. But that ratio affects media wear, cycle time, and part-on-part impingement. When quantities surge, I often move from rigid bowls to centrifugal discs so I can cut ratios and still get uniform coverage. The media choice must survive that higher impact without fracturing. Vitrified ceramic holds up; resin-bonded plastic may break down in half the time under those conditions.
Cycle Time Budget
If your target is 25 minutes per batch door-to-door, you can’t afford a gentle plastic deburring step that takes 60 minutes. Here’s how I ballpark:
- Heavy edge break and blending: ceramic, 15–25 min in centrifugal, 40–60 min in vibratory.
- Medium surface refinement: ceramic or plastic fine-grit, 10–20 min centrifugal, 25–40 min vibratory.
- Pre-polish / cosmetic: plastic or organic media with compound, 5–15 min in high-energy units.
The real decision point is whether you can combine steps. Some shops try to consolidate deburring and polishing into a single media-and-compound run. It rarely works for dental parts where critical edges must stay sharp. Plan for at least a two-stage sequence if your Ra target is below 0.3 µm.
5. Compatibility with Your Finishing Equipment (Vibratory, Centrifugal, Drag)
Incompatible equipment-media matching is the top reason finishing lines stall after a media change. I ask three questions before I pair them:
- What’s the energy input — and can the media absorb it without shattering?
- Does the machine create a flow pattern that works with the media shape?
- Can we separate media from parts effectively at the end?
Vibratory Bowls and Tubs
Vibratory machines generate a rolling, circular flow. Angular media (triangles, wedges) cut faster here because they present sharp edges to the part constantly. Rounded media tend to slide. Plastic media works beautifully in vibratory bowls — the lower impact reduces fracture risk. However, separation is trickier: fine plastic triangles can wedge into box locks of forceps. I spec 5 mm or larger if the part has hinge cavities; otherwise, I budget extra labour for manual pick-out.
Centrifugal Disc and Barrel Machines
Centrifugal finishing packs parts and media into a high-pressure toroidal flow. Media must be dense and tough. Vitrified ceramic excels. I avoid lightweight plastic here unless the machine speed can be dialed back — otherwise you’ll wear through the media charge in days, not weeks. The upside: cycle times shrink by 50–70% versus vibratory, making it the right choice for implant components with tight Ra specs and high volumes.
Drag Finishers
Drag finishing spins parts through a stationary media bed at programmable speeds and depths. This is where I introduce specialty media like porcelain pins or small-diameter ceramic beads (1–2 mm). They reach internal bores and complex implant geometries that no vibratory media can touch. The trade-off: drag finishing is slower per part, so it’s usually reserved for high-value instruments like implant abutments or customized surgical kits.
6. Cost-Benefit Analysis: Media Longevity vs. Initial Price
I watch buyers chase the lowest price per pound and then pay for it three times over in replacement frequency, rework, and damaged parts. Here’s how I build the real cost picture.
Cost Drivers Beyond the Invoice
- Media lifespan in operating hours. A vitrified ceramic triangle might run 800–1,200 hours before it’s too small to use; a resin-bonded plastic equivalent might last 150–250 hours in the same machine.
- Waste disposal. Ceramic media generates heavier, inert waste. Plastic media is lighter but must be checked for absorbed compounds if you’re disposing in certain regions.
- Compound consumption. Aggressive ceramic media consume more liquid compound to keep the cut clean. That cost adds up.
Comparative Media Cost Snapshot
| メディア・タイプ | Relative Price per kg | Typical Useful Life (hours) | Cost per 1,000 Parts Processed (est.) | Best Use Scenario |
|---|---|---|---|---|
| Vitrified Ceramic, 8 mm Triangle | $$$ | 800–1,200 | Lowest long run | High-volume stainless deburring |
| Resin-bonded Ceramic, 6 mm Wedge | $$ | 400–600 | 中程度 | Mixed titanium/stainless lines |
| Plastic (Polyester), 6 mm Cylinder, Fine Grit | $$ | 150–250 | Moderate to high | PEEK, delicate titanium parts |
| Plastic (Urea), 4 mm Cone, Fine Grit | $ | 80–150 | Higher at volume | Low-volume specialty, prototype runs |
| Porcelain Beads, 2 mm | $$$$ | 500+ (in drag finisher) | Low per part, high upfront | Implant internal features |
The price symbols here are relative indicators; absolute numbers shift with suppliers and order volumes. But the pattern holds: the cheaper media often cost more by the time you’ve replaced them twice and reworked the first batch of parts that got surface contamination from broken-down resin.
I always run a simple calculation: (media cost per load × number of loads per month) + (compound for those loads) + (labour to change out media). Even a rough estimate usually shows that spending 20% more on media can drop the per-part finishing cost by 30%.
7. Case Examples: Selecting Media for Scalers, Forceps, and Implants
I’ll walk through three real-world selection sequences — not theoretical, but the kind of decisions that happen when you’re standing at the machine with a production deadline.
Periodontal Scalers (Stainless Steel)
Challenge: Sharp, thin working tips must remain razor-edged after finishing. The shank must have a bright, non-directional surface at Ra ≤ 0.2 µm.
Selection: Stage 1 — vitrified ceramic, 8 mm angle-cut cylinders, medium grit, 20 min in centrifugal disc at 120 RPM. This removes forging scale and machining marks without dulling the tip because cylinders roll more than cut at the extreme tip.
Stage 2 — resin-bonded plastic, 4 mm cones with fine aluminum oxide, 15 min in vibratory bowl with a mild alkaline compound. This brings the Ra to 0.15–0.18 µm and creates the bright cosmetic finish without iron pickup. The cones reach into the shank-tip transition without lodging.
Hemostatic Forceps (Stainless Steel, Box Lock)
Challenge: Deburr inside the box lock without rounding the serrations. Finish the outer surface to a consistent satin.
Selection: Stage 1 — ceramic triangles, 6 mm, vitrified bond, aggressive grit. Cycle in a vibratory tub with a 4:1 ratio. The triangle points break the sharp edges in the box lock; flow must be checked after 30 min to ensure no media jamming. If jamming occurs, switch to 4 mm triangles.
Stage 2 — plastic wedges, 5 mm, fine grit, 25 min vibratory. This smooths the outer surface and the serration tips without eating away the grip profile. A final rinse and passivation follow.
Titanium Implant Abutments (Internal Hex)
Challenge: Mirror finish on the transmucosal contour, no media residue inside the hex, Ra ≤ 0.1 µm.
Selection: Two-step process only after CNC machining. Stage 1 — high-purity ceramic media, 3 mm spheres, in a drag finisher at 60 RPM spindle speed. The small spheres polish the external curvature and can enter the hex under controlled depth without lodging.
Stage 2 — porcelain beads, 1.5 mm, in the same drag finisher with a fine polishing paste, 20 min. This achieves the mirror luster. Critical: verify no bead retention in the hex with air blow-off and 20x inspection on every lot. If beads lodge, drop to 1.2 mm beads and shorten cycle by 2 min.
8. Common Selection Mistakes and How to Avoid Them
I’ve made most of these myself. The table below is the cheat sheet I wish someone had handed me early on.
| Mistake | What It Looks Like on the Line | How to Fix It |
|---|---|---|
| Using media that’s too large for instrument geometry | Media jamming in box locks, uneven finish in recesses, bent tips | Reduce size by 2 mm increments until flow clears all cavities; test with 20 parts minimum |
| Ignoring iron contamination risk on titanium | Dark spots, rust-like stains after autoclave, failing passivation tests | Switch to high-purity ceramic or plastic with aluminum oxide grit; verify material certification from supplier |
| Choosing media solely on price per kilogram | Frequent media change-outs, inconsistent finish, rising compound usage | Calculate cost per 1,000 parts processed; factor in labour and downtime; shortlist media with at least 400-hour lifespan for high-volume lines |
| Single-step process for Ra < 0.3 µm | Glossy but wavy surface, plateau polish, high reject rate | Split into cut and polish stages; use harder media first, then soft media with compound |
| Mismatched media bond hardness to equipment energy | Rapid media breakdown in centrifugal machines, or no cut in vibratory | Match bond: vitrified for high energy, resin-bonded for low-to-medium energy; confirm with supplier technical data for your machine RPM and amplitude |
| Neglecting compound/media synergy | Burn marks on PEEK, foam overflow, residue on stainless | Run a trial with the supplier’s recommended compound at three concentrations; adjust flow rate until surface dries clean without haze |
When a process goes sideways, my first check is always the media age. If the charge has lost 20% or more of its original size, I replace it before I touch any other variable — because worn media changes cut rate, flow, and residue patterns all at once.
9. Checklist for Requesting Samples from Media Suppliers
Don’t let a supplier send you “standard dental media” without a spec sheet. I use this checklist every time I set up a trial. It forces the supplier to commit to measurable properties, not marketing.
Media Sample Request Checklist
- Material type and grade: Ceramic (vitrified or resin bond, specify Al₂O₃ or SiC grit), plastic (polyester or urea, specify filler content), or organic.
- Shape and exact dimensions: Request a dimensioned drawing or at least length × width × thickness with tolerance.
- Abrasive grit type and mesh size: e.g., 120-grit aluminum oxide. Ask for the grit loading percentage if it’s critical for titanium cleanliness.
- Bond hardness or density: Supplier’s internal scale or specific gravity — needed to match equipment energy.
- Certification for medical use: Statement of iron content (ppm) for titanium work, absence of hazardous fillers.
- Recommended machine type and parameters: RPM, amplitude, media-to-part ratio, cycle time range.
- Compatible compound families: Acidic, alkaline, or neutral; recommended concentration.
- Expected lifespan data: Hours or number of cycles to 20% size reduction under their recommended conditions.
- Washability and separation method: Does it screen out cleanly? Magnetic or manual separation requirements.
- Sample quantity: Enough to fill your smallest production machine at the recommended ratio — usually 10–25 kg.
- Safety data sheet (SDS): For compound and media dust.
- Reference parts: Send 3–5 production parts to the supplier so they can run a preliminary test and suggest the starting setup. Don’t skip this step — it reveals fit issues before you invest in a full batch.
When the sample arrives, I run a side-by-side with the current production media using exactly the same machine settings. Then I check surface finish, cycle time, wear particulate, and — equally important — how the operators feel about loading and unloading. If the new media adds five minutes of manual separation per batch, the process cost just went up, even if the media were free.
よくある質問
- Can I use the same ceramic media for titanium and stainless steel?
- No, not if you want clean titanium surfaces. Iron-oxide pigments in standard ceramic can transfer to titanium and create corrosion sites. Designate a separate media charge for titanium or use high-purity alumina-based ceramic that’s certified iron-free.
- How do I know when media should be replaced?
- Weigh a standard scoop of media from a known-good batch and chart it monthly. When the weight drops below 80% of the original — or if you see inconsistent surface finish and fine dust increasing — it’s time for a change. Some shops use a simple sieve test: if more than 15% fits through a screen two sizes below the original spec, replace the charge.
- What’s the fastest way to increase Ra reduction without new equipment?
- Upgrade the media bond hardness (e.g., from resin to vitrified ceramic) or increase media-to-part ratio to 4:1 in vibratory. But watch part impingement — add an extra dam or flow modifier if you see denting.
- Is wet finishing always required for dental instruments?
- Almost always, yes. Dry media processes generate heat and dust that can warp thin scalers, create uncontrolled scratches, and embed residue. A liquid compound flow keeps the media clean, cools the parts, and helps rinse away swarf.
- Do I need a separate finishing line for PEEK parts?
- If your volume is more than a few hundred parts per month, yes. Cross-contamination from ceramic or metal fines abrading PEEK will show up as embedded black specks under magnification. A dedicated plastic media bowl is the simplest way to prevent it.
フィルター