Color Consistency and Dye Preparation for SLS Parts After Ceramic Bead Blasting
Colour consistency is one of the most commercially sensitive quality dimensions in SLS production. Parts that dye unevenly, show batch-to-batch colour variation, or carry visible patches under directional light generate customer complaints and rework costs that quickly dwarf the cost of the blasting operation itself. Ceramic bead blasting is the surface preparation step that eliminates these problems — by removing the heterogeneous semi-sintered skin and creating a uniform, controllable surface for dye uptake. This guide explains exactly how it works and how to dial in the protocol for your colour targets.
1. How PA12 and PA11 Absorb Dye: The Role of Surface Microstructure
PA12 and PA11 nylon SLS parts are typically dyed using acid dyes or reactive dyes formulated for polyamide. The dyeing mechanism is straightforward: dye molecules dissolved in a hot aqueous bath (typically 90–98°C) diffuse from solution into the surface of the nylon part. Once inside the nylon, they form ionic bonds with the amide groups (–CO–NH–) in the polymer chain, becoming locked into the nylon structure and producing permanent colour.
The depth and uniformity of this dye penetration is controlled by two factors: dye bath conditions (temperature, concentration, time, pH) and part surface microstructure. Dye bath conditions are straightforward to standardise. Surface microstructure, in contrast, is inherently variable on as-built SLS parts — which is the root cause of dyeing inconsistency in unprocessed SLS output.
Dye molecules penetrate the nylon surface preferentially through the amorphous (non-crystalline) regions of the polymer, where chain mobility is higher and molecular packing is looser. The more amorphous the surface region, the faster and deeper the dye penetrates. Surface porosity — the density of micro-pores and surface voids — also accelerates dye uptake by increasing the surface area in contact with the dye solution per unit of projected area.
2. Why Unblasted SLS Parts Dye Unevenly
As-built SLS parts have a heterogeneous surface at the microscale. The outermost layer — the semi-sintered skin — consists of partially fused nylon particles bonded to the part surface during the build. This skin has:
- Higher amorphous content than the fully sintered bulk — partially sintered particles are less crystalline than fully fused nylon
- Higher porosity — inter-particle voids in the semi-sintered zone create a sponge-like micro-texture
- Heterogeneous distribution — the skin is thicker and more porous over areas that received more thermal exposure from adjacent laser scans; thinner and denser over areas at the outer boundary of the sintered zone
When this heterogeneous surface enters the dye bath, dye penetrates rapidly and deeply into high-porosity zones (producing dark patches) and slowly and shallowly into dense zones (producing light patches). The result: a mottled, non-uniform colour that is especially visible on large flat faces, which simultaneously display areas sintered at different distances from laser scan lines.
Build-to-build colour variation is the second consequence. Different builds produce slightly different thermal histories and slightly different semi-sintered skin properties — so even with identical dye bath conditions, different builds of the same part may emerge from the dye bath with measurably different colour (ΔE 3–8 is typical for unblasted SLS parts dyed in the same bath).
3. How Ceramic Bead Blasting Prepares the Surface for Dyeing
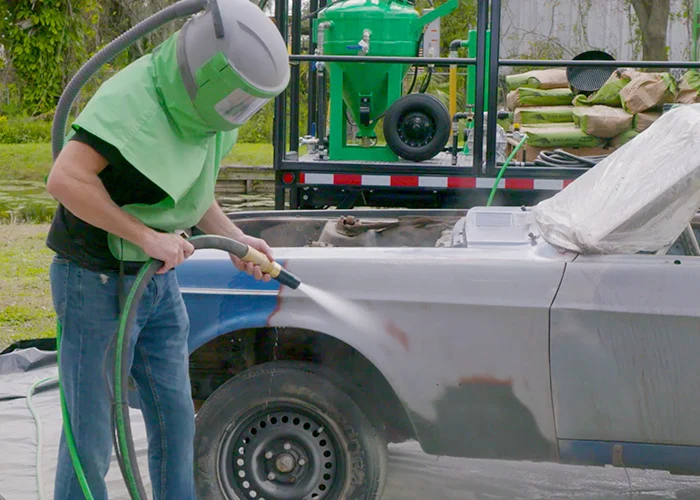
Ceramic bead blasting removes the heterogeneous semi-sintered skin and exposes the uniform bulk sintered nylon beneath. The peening action of ceramic bead impact simultaneously:
- Breaks and dislodges the semi-sintered skin particles, exposing the more homogeneous sintered surface below
- Mechanically opens the surface microstructure — creating a consistent network of fine surface asperities and micro-scale deformation zones that are uniform across the entire blasted area
- Reduces and homogenises Ra across all build orientations, so horizontal and side faces present the same surface texture to the dye bath
The result: a post-blast PA12 or PA11 surface that is compositionally and structurally uniform at the scale relevant to dye uptake. Dye molecules entering this surface find the same amorphous content, the same porosity, and the same surface texture everywhere — producing uniform colour uptake and dramatically reduced batch variation.
Typical improvement in batch-to-batch ΔE after implementing ceramic bead blasting before dyeing: from ΔE 3–8 (unblasted) to ΔE 0.5–2.0 (consistently blasted), achieved without any change to dye bath chemistry or process parameters.
4. Bead Size and Its Effect on Colour Depth
The surface Ra produced by the pre-dye blast controls the colour depth of the dyed part. This is a direct, reproducible, and process-controllable relationship:
| Bead Size (ZS) | Surface Ra After Blast | Dye Depth (Relative) | Colour Result |
|---|---|---|---|
| 0.05–0.10 mm | Ra 3–6 µm | Shallow (lowest) | Light, pastel, high chroma at reduced saturation |
| 0.10–0.15 mm | Ra 4–8 µm | Moderate-light | Medium-light; ideal for bright primaries and light tones |
| 0.15–0.20 mm | Ra 6–10 µm | Moderate-deep | Standard production colour depth; recommended starting point |
| 0.20–0.30 mm | Ra 8–13 µm | Deep | Maximum saturation; ideal for black, navy, dark grey |
The mechanism: higher Ra means more surface area per projected unit area, more surface micro-porosity per unit, and deeper surface asperities for dye molecules to enter. At Ra 6–10 µm the surface provides a balance of dye depth and colour uniformity that works across most standard colour targets. Moving to coarser beads and higher Ra deepens colour further but also slightly increases colour variation within a batch (because the more textured surface has more local Ra variability).
Practical application: if your standard black protocol consistently produces a finished part that is ΔE 3–5 lighter than your colour standard, switch from 0.10–0.15 mm to 0.18–0.25 mm beads before the dye bath. The colour will deepen measurably without any change to dye bath concentration or temperature — a cleaner, less costly adjustment than increasing dye loading.
5. Pre-Dye Blast Protocol by Colour Target
| Colour Category | Examples | Recommended Bead Size | Pressure | Target Ra |
|---|---|---|---|---|
| Very dark / maximum depth | Black, graphite, dark navy | ZS 0.18–0.28 mm | 60–70 PSI | Ra 8–13 µm |
| Standard dark colours | Navy, dark red, dark green | ZS 0.15–0.22 mm | 57–67 PSI | Ra 7–11 µm |
| Standard mid-tone colours | Medium blue, standard red, forest green | ZS 0.12–0.18 mm | 53–63 PSI | Ra 5–9 µm |
| Light / pastel colours | Sky blue, light grey, pale yellow | ZS 0.08–0.14 mm | 47–57 PSI | Ra 4–7 µm |
| Colour calibration (first article) | Any new colour standard | Blast coupon at 2 sizes; measure ΔE against standard | As above | Select by ΔE result |
These are starting protocols — each operation will need to validate against their own dye formulation, bath temperature, and part geometry. The table provides the pre-dye blast parameter search space; first-article dye trials with colour measurement identify the optimum point within that space for your specific colour standards.
6. Timing: From Blast to Dye Bath
The interval between ceramic bead blasting and immersion in the dye bath affects colour uptake because the blasted surface can be contaminated or its chemistry altered between the two operations.
Blast-to-dye timing rules
- Ideal: transfer to dye bath within 1–2 hours of blasting, while the surface is freshly opened and clean
- Acceptable: up to 4 hours for dry-blasted PA12 in a clean, low-humidity environment
- Maximum: 24 hours if stored in a sealed clean bag in a low-humidity environment; risk of mild colour variation from ambient contamination increases over this interval
- Never: dye parts that have been handled with bare hands after blasting (skin oils contaminate the surface and produce lighter spots or pinholes in the colour)
- Wet-blasted parts: dry at 60–70°C for 2–4 hours first; transfer to dye bath within 1 hour of removing from oven
Between blasting and dyeing, avoid contact with cutting oils, mould release agents, packaging plastics that outgas plasticisers, or humid environments. Any surface contamination that interferes with the dye bath’s wetting of the nylon surface will produce pinholes or local colour voids in the finished part.
7. Colour Measurement and Batch Consistency
Colour measurement on dyed SLS parts uses a spectrophotometer to quantify colour as CIE L*a*b* coordinates. The key metric for batch consistency is ΔE (also written ΔE00 for the CIEDE2000 formula) — the total colour difference between a measured part and the approved colour standard.
- ΔE < 1.0: imperceptible colour difference — excellent for any application
- ΔE 1.0–2.0: very slight difference perceptible only under ideal viewing conditions — typically acceptable for production SLS parts
- ΔE 2.0–3.5: visible difference under side-by-side comparison — may or may not be acceptable depending on application
- ΔE > 3.5: clearly visible to most observers — typically not acceptable for commercial appearance parts
For production QC, measure at least 3 parts per batch at a standardised surface location and orientation (horizontal face, same position relative to the build direction). Measure against a colour standard that was established from a part that was blasted with the same protocol that will be used in production.
Important: establish the colour standard from a part that was blasted with the same protocol, not from an unblasted reference — otherwise the standard includes the colour shift produced by blasting, and any production part blasted at a different Ra will show a colour deviation against that standard.
8. Batch-to-Batch Colour Consistency Improvement
The most commercially visible improvement from introducing ceramic bead blasting into an SLS dyeing workflow is the reduction in batch-to-batch colour variation. SLS builds inherently vary slightly in their thermal history — slight temperature fluctuations in the build chamber, powder reuse ratios, and part packing density all affect the crystallinity and surface structure of the semi-sintered skin. Without blasting, these build-to-build variations translate directly into colour variation.
With a standardised pre-dye ceramic bead blast protocol, the starting surface condition for each batch is normalised: the semi-sintered skin (which varies between builds) is removed, and a consistent Ra surface (which is controlled by the blast protocol, not the build parameters) is presented to the dye bath. The result is that batch-to-batch ΔE, which commonly runs 3–8 on unblasted SLS production, typically falls to 0.5–2.0 after a standardised blast protocol is established and maintained.
For SLS operations where colour consistency is a customer specification — particularly in consumer products, medical devices, and branded industrial components — this improvement in batch consistency is often the primary business case for ceramic bead blasting, independent of the surface finish Ra benefit.
よくある質問
As-built SLS parts have a heterogeneous surface: the semi-sintered skin has higher porosity and amorphous content than the fully sintered bulk material. Dye penetrates faster and deeper into high-porosity semi-sintered zones, producing darker patches, while denser sintered zones absorb dye more slowly and appear lighter. The result is a mottled, non-uniform colour clearly visible under directional light. Ceramic bead blasting removes this heterogeneous semi-sintered layer and exposes a uniform, dense sintered surface that absorbs dye evenly — eliminating colour patchiness.
For standard and dark colours (black, navy, dark grey): ZS 0.15–0.22 mm to achieve Ra 7–11 µm — gives deep, saturated colour. For medium colours (standard red, blue, green): ZS 0.12–0.18 mm for Ra 5–9 µm — balanced depth and uniformity. For light or pastel shades: ZS 0.08–0.14 mm for Ra 4–7 µm — limits dye uptake depth for lighter saturation. Validate your selection by blasting reference coupons at two sizes and measuring colour with a spectrophotometer against your colour standard before committing to a production pre-dye protocol.
Transfer dry-blasted PA12 SLS parts to the dye bath within 2 to 4 hours of blasting. Parts exposed to ambient air for longer may accumulate surface dust or moisture that interferes with even dye uptake. If dyeing cannot begin within 4 hours, store blasted parts in a sealed clean bag. Never handle blasted parts with bare hands before dyeing — skin oils contaminate the blasted surface and produce pinholes or local colour voids in the finished part. For wet-blasted parts, dry at 60–70°C for 2–4 hours before dyeing.
Yes — bead size is a direct control variable for colour depth. Finer beads produce lower Ra (smoother surface) which limits dye penetration depth, giving lighter, more pastel results. Coarser beads produce higher Ra (more texture) which increases dye uptake area and depth, giving deeper, more saturated colour. If your standard black dye bath is producing lighter-than-target output, switching from 0.10–0.15 mm to 0.18–0.25 mm beads will deepen the colour without changing dye chemistry. This bead-size approach to colour control works independently of dye bath concentration and temperature, providing a cost-effective tuning lever for existing dye operations.
Related Articles in This Series
Return to the Ceramic Beads for SLS Powder Removal — Complete Guide for the full overview.
PA12-specific blast protocol including pre-dyeing surface prep and Ra targets.
PA11 dyeing differences from PA12 — dwell time adjustment and moisture management.
Complete size selection matrix — how to choose bead size for both cleaning and colour targets.
Ra data by bead grade, size, and pressure — the technical basis for colour depth control.
How the choice of wet or dry blasting affects surface condition and colour uniformity before dyeing.
Pressure and cycle time parameters that work in combination with bead size to control Ra.
Specify Ceramic Beads for Consistent SLS Dyeing Results
Jiangsu Henglihong Technology Co., Ltd. supplies ZS ceramic blasting beads in size ranges from 0.05 mm to 0.35 mm specifically suited for pre-dyeing surface preparation of PA12 and PA11 SLS parts. Tell us your colour target and current dyeing protocol — we will recommend the right bead size range and provide samples for first-article dye validation.
Request Samples & Colour Prep Guidanceフィルター