Abrasive Media for Dental Instrument Finishing: The Complete Guide
What Are Abrasive Media and Their Role in Dental Instrument Finishing
I spent my first three months on the finishing floor thinking media was just the stuff that went into the vibratory bowl. By the time I’d seen a batch of periodontal scalers come out with micro-pitting and another batch of ortho pliers that failed a simple wipe test for free iron, I knew better. Abrasive media isn’t filler — it’s the tool that touches every critical surface of a dental instrument before it ever touches a patient. In aerospace, they call blasting media “engineered grain.” In dental manufacturing, we need to treat it with the same rigor.
At its simplest, abrasive media is a mass of pre-shaped or randomly shaped particles used in bulk finishing equipment — vibratory bowls, centrifugal discs, drag finishers, and barrel tumblers — to perform material removal, edge radiusing, surface smoothing, or polishing. For dental instruments, the end goal is not just cosmetic. A properly finished elevator tip, implant carrier, or ligature director must meet stringent requirements for surface roughness (common target Ra values for tissue-contact instruments land around 0.2–0.4 µm, though each specification stems from the device classification), pass biocompatibility assessments, and resist corrosion under repeated sterilization. Media choice directly influences every one of those outcomes.
The way I explain it to new process engineers is this: the abrasive media acts as the carrier of energy, the delivery mechanism for the abrasive grain, and the geometry shaper all at once. It translates the machine’s motion — whether high-energy centrifugal force or gentle vibratory roll — into localized contact on the parts. If the media is too aggressive, it can round a delicate lancet tip beyond tolerance. If it’s too soft or glazed, you’ll see no real improvement in surface finish after six hours of runtime, which means you’ve burned labor, compound, and maybe even instrument steel without closing out the work order.
In dental finishing, we’re almost always working with stainless steels — 316L, 17-4 PH, 440C, or specialized cobalt-chrome alloys. These materials respond differently to ceramic, plastic, and organic media. The media’s own composition, binder hardness, particle size distribution, and shape factor all determine whether you’ll hit your target Ra in one step or need a multi-step sequence. A common sequence I’ve used on hinged forceps starts with a medium-cut ceramic triangle to remove machining marks, followed by a pre-polish plastic cone charged with a fine alumina compound, then a dry organic walnut shell tumble to absorb any remaining compound film — three different media types, one finished part.
Ignoring media science is what leads to batch rejections. I recall a case where a team switched from a high-density ceramic to a lighter, unfilled plastic cone to save on machine wear, but didn’t recalculate the media-to-parts volume ratio. The lighter media didn’t transmit sufficient contact force, and after two processing cycles, edge definition on curette blades was inconsistent. The fix was obvious in hindsight: match media density to the equipment’s energy level. But it only became obvious after root-cause investigation, not before.
So the role of abrasive media is to be your controllable interface between equipment power and part surface. If you treat it as a variable you can dial in — not a default — you’re already ahead of half the shops I’ve visited.
Primary Types of Abrasive Media for Dental Applications
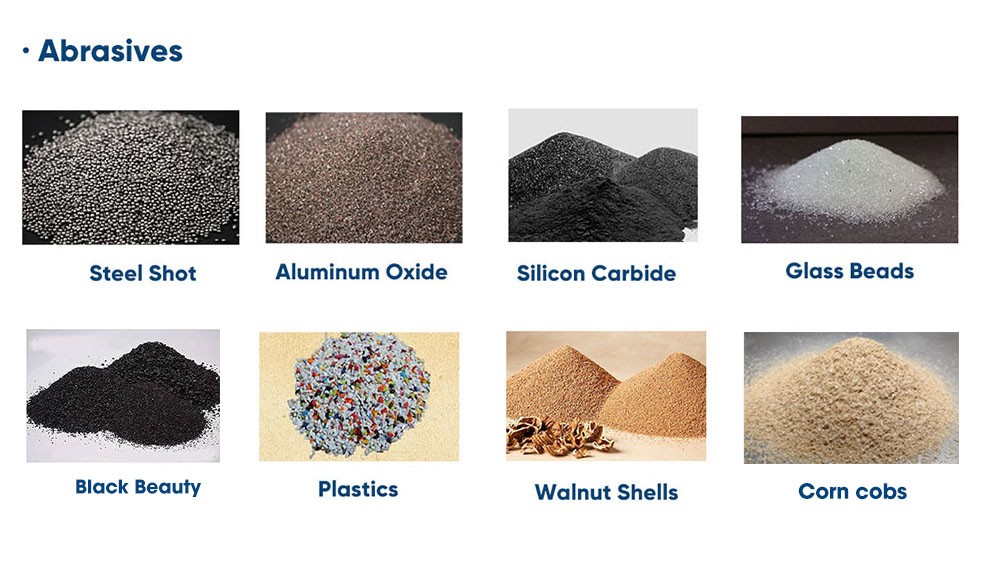
Walk into any finishing supply catalog and you’ll see dozens of media formulations. For dental work, I break it down into three families that actually get used in validated processes: ceramic, plastic (synthetic), and organic. I’m deliberately leaving out specialty metal media — stainless steel pins and balls do appear in some high-energy deburring, but I rarely specify them for dental instruments because of cross-contamination risks and the difficulty of removing metallic residue from fine crevices. If you ever have to prove cleanliness on a surgical instrument, metal media residue complicates the validation protocol more than it’s worth.
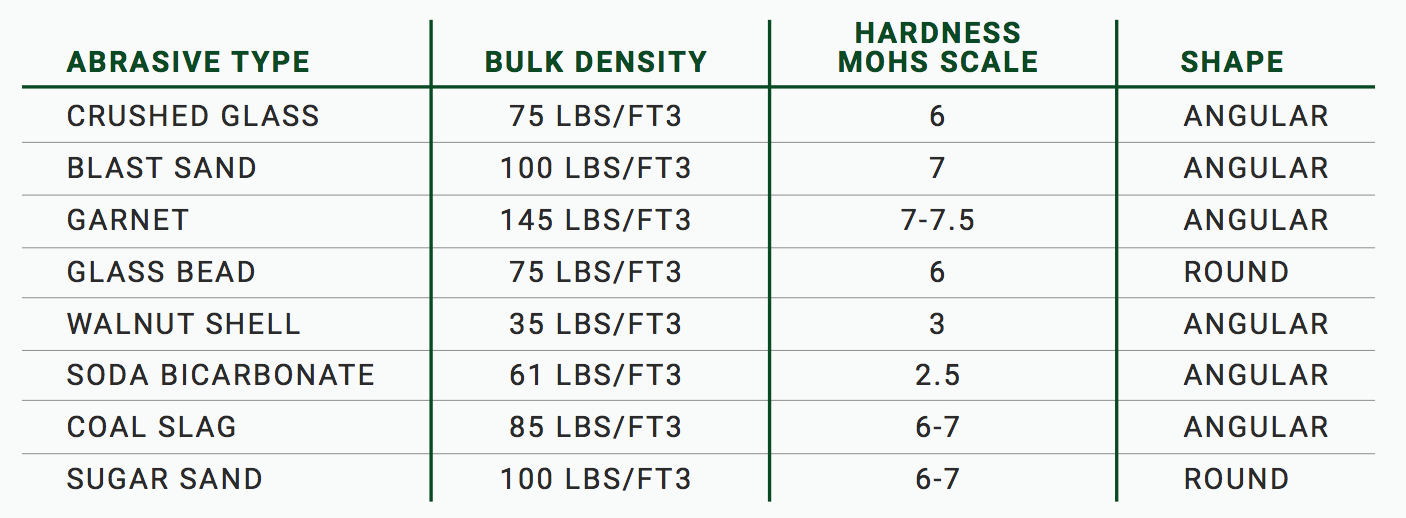
Each family serves a distinct purpose, but they often overlap in multi-step sequences. What matters is that you understand the physical mechanism: ceramic cuts and grinds, plastic cuts lightly and conforms to complex shapes, organic absorbs, dries, and imparts final luster. The table below gives an overview, but don’t treat the numbers as absolutes — your compound chemistry and water quality will shift the practical results more than the spec sheet admits.
| Media Family | Typical Composition | Hardness (Mohs) | Density Range (g/cm³) | Primary Action | Common Dental Use |
|---|---|---|---|---|---|
| Керамика | Alumina, silica, or zirconia grains in vitrified binder | 7–9 | 2.3–3.5 | High stock removal, edge radiusing, smoothing | Forceps, clamps, implant wrenches |
| Пластик | Polyester or urea resin with embedded abrasive (Al₂O₃, SiC) | 3–4 | 1.2–1.5 | Light cut, pre-polish, fine finishing | Scalers, curettes, delicate probes |
| Organic | Walnut shell grit, corn cob meal, wood flour blends | 1–3 | 0.8-1.2 | Absorption, drying, high-luster polishing | Final polish, post-plastic cleaning |
These categories are not rigid walls. You’ll see plastic media without abrasive filler (often called “non-abrasive plastic”) used as a cushioning spacer in some sequences, and ceramic media that’s been pre-glazed to smooth out its own cutting action. The key is to map your requirement — say, a 0.3 µm Ra on a sickle scaler cutting edge — and then work backward to which family, shape, and compound combination can deliver that without blunting the edge. Often the answer requires two or even three families in series.
Ceramic Media: Properties and When to Use
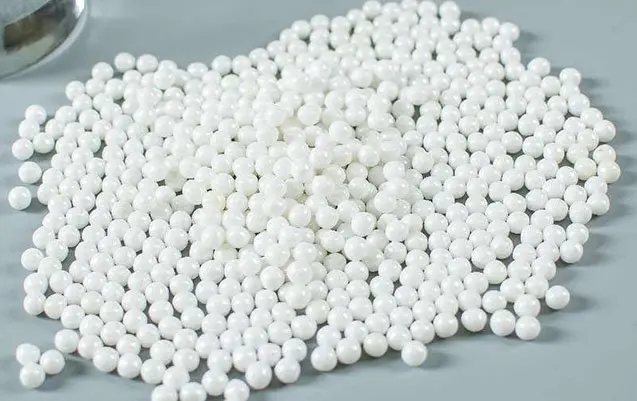
Ceramic is my go-to when a dental instrument comes off a CNC Swiss lathe with obvious tool marks or when I’m dealing with a thick parting-line flash from investment casting. It’s the heavy lifter. The binder is typically vitrified clay with aluminum oxide as the cutting grain, though premium grades use zirconia-toughened alumina for longer life and less self-wear. Because the media itself erodes slowly, it maintains an aggressive cutting surface across multiple cycles — good for production consistency, bad if you forget to check that it hasn’t shrunk below your minimum clearance size.
Shapes matter enormously. For dental forceps with box joints, I specify angle-cut triangles or cones so they reach into the hinge area without lodging. For implant impression copings, a ball-cone or arrowhead shape navigates the concave internal geometry better than a generic tri-star. In some high-energy centrifugal setups, I’ve seen standard pyramids break down into sharp shards after a few hundred cycles, which then score the instruments. That’s a sign the binder isn’t rated for the G-forces you’re generating. Stop the process immediately if you start finding ceramic fragments in your screen — the fragments will destroy surface finish and can embed in stainless steel surfaces under pressure, creating corrosion initiation sites.
When deciding on ceramic, weigh the trade-off between time and subsequent processing. A ceramic-heavy cycle can remove stock fast, but might leave a surface with a matte appearance and Ra in the range of 0.5–0.8 µm, which then needs plastic smoothing. I typically budget one additional step after ceramics if the final specification calls for a satin or bright polish. If the part has sharp functional edges — like a dental chisel or a scalpel handle dovetail — I watch the edges closely after every ceramic cycle; over-processing can round them beyond the functional limit in as little as 20 extra minutes. A 10X loupe inspection becomes routine.
Water quality in ceramic processing can’t be an afterthought. Ceramic media with high alumina content often requires a constant flow of process water to carry away swarf, but if your water hardness is above 150 ppm CaCO₃, I’ve seen calcium deposits form on the media surface over time, effectively glazing it and killing cut rate. A water softener or reverse osmosis line upstream of the compound dosing unit is cheaper than chasing mysterious downtime. For more on ceramic specifics and how they perform across instrument families, the guide on Ceramic Abrasive Media for Dental Instruments breaks down formulations and shape selections in detail.
Plastic Media: Benefits and Typical Applications
Where ceramic removes, plastic refines. I reach for plastic media when the instrument’s geometry is intricate — think Gracey curettes, scalers with fine tips, or complex implant abutments — and when I can’t afford to lose edge sharpness. Plastic media is a polyester or urea-based resin that can be used unfilled (non-abrasive) or loaded with abrasive grains. The key advantage is its specific gravity: at 1.2–1.5 g/cm³, it exerts less impact force per contact than ceramic, so it’s gentler on delicate features. The downside is that cut rate drops, cycle times extend, and you need to be precise with compound addition rates or you’ll just polish the media without progressing the work.
I typically select plastic after a ceramic roughing step, but sometimes I’ll skip ceramic entirely for fine instruments that are already near net shape from electrochemical machining or precision grinding. For a set of perio probes, a pre-polish plastic formulation with 600-grit aluminum oxide can take a surface from 1.2 µm Ra to below 0.35 µm Ra in a vibratory bowl over 45–60 minutes, provided the media shape mirrors the concave aspects of the shank. Star-shaped plastic media often outperform triangles on long, slender instruments because they distribute contact points more evenly.
A common mistake I see is using the same plastic media for both cut-down and final polish. Plastic holds compound, and if you’ve been running an aggressive compound with coarse grit, the media pores get loaded. When you then try to use that same charge for a finishing step, you’re reintroducing scratches. I keep separate charges: one for cut-plastic and one for finish-plastic, clearly labeled with date and grit compound used. Changing charges based on work order isn’t a luxury — it’s how you avoid cross-contamination of finishes. The Plastic Abrasive Media for Dental Finishing article covers additional considerations for compound pairing and media breakdown rates in production environments.
One more factor: static charge. Plastic media in a dry process can build up static, attracting fine dust and lint to the instruments. If you’re finishing in a cleanroom or near an assembly area, ground your equipment properly and consider anti-static liquid compounds. I learned that lesson after a seemingly clean batch of matrix bands picked up airborne cardboard fibers during transfer — avoidable with a simple static check.
Organic Media: Walnut Shell, Corn Cob, and More
Organic media often gets underestimated because it doesn’t look like a “technical” abrasive. But in dental instrument finishing, dry organic cycles solve real problems: they absorb residual oils and compound films, dry parts for packaging, and deliver a clean, high-luster surface without embedding foreign particles. Walnut shell grit and corn cob meal are the mainstays. Walnut shell is harder (roughly 2–3 Mohs) and gives a mild polishing action, while corn cob is softer and excels at absorbency and drying. I frequently use them as the final step in a three-stage sequence, after plastic pre-polish, to yield a biologically clean surface ready for passivation.
One parameter that doesn’t show up on spec sheets but matters in practice: oil content of the organic media. Some walnut shell products carry residual natural oils that can transfer to instruments during a dry tumble. On a passive surface, that oil can interfere with subsequent laser marking or passivation procedures. I always request a “clean, oil-free” certification from the supplier and verify with a simple water-break test on a test coupon after processing. If the water sheets off uniformly, you’re good. If it beads, you’ve got a film that needs a wash step.
Organic media is also more forgiving for delicate orthodontic components. Brackets, bands, and archwire slots can be polished with fine walnut shell grit without altering critical dimensions. However, dust generation is a real concern. Dry organic tumbling creates fine respirable dust that, if not properly extracted, settles on everything and can become a housekeeping and respiratory issue. I always pair an organic cycle with a dedicated dust collection system and filtered exhaust, and I schedule deep cleaning of the surrounding area after every 40–50 operating hours.
The lifetime of organic media is shorter than ceramic or plastic; it absorbs moisture from air and compound residues, eventually losing its friable polishing action. I discard corn cob media when it smells musty or feels compacted in the bowl — usually after 60–90 hours of cumulative runtime for corn cob, and up to 150 hours for walnut shell, depending on the compound load. Replace early rather than trying to stretch it; the cost of fresh media is trivial compared to a rejected lot of instruments. For a closer look at formulations and how to match them to specific instrument sets, see Organic Abrasive Media for Dental Instruments.
Key Factors in Choosing the Right Abrasive Media
If there’s one question I get asked most by process owners, it’s some version of “Which media should I start with for this new instrument?” My answer always starts with a counter-question: “What is the single feature you cannot afford to degrade?” That could be a 20 µm cutting edge on a scaler, an internal thread in an implant driver, or a mirror finish on a visible surface. The media decision flows from that constraint, not from a generic chart. Still, there is a rational sequence I use for selecting media, and it goes like this:
1. Geometry sensitivity. Map the smallest critical radius, sharpest edge, and deepest blind cavity on the instrument. This number dictates maximum media size. I keep a simple rule: media dimension (across the major axis) should be no larger than two-thirds of the smallest internal feature to avoid lodging. If you have a 1.2 mm internal bore, your media must pass through a 0.8 mm screen.
2. Material hardness. Most dental stainless steels are in the 25–35 HRC range for austenitics and up to 50+ HRC for martensitics. Ceramic works on all of them, but on precipitation-hardened alloys like 17-4 PH at H900 condition, I’ve seen aggressive ceramics cause stress-relief grain boundary attack — not common, but detectable under SEM. When in doubt, test coupon first.
3. Target Ra and visual criteria. Convert the cosmetic specification into a measurable Ra if not already done. If the print says “satin finish,” I ask the customer to provide a reference sample and measure it; typical satin is 0.3–0.6 µm Ra. Use that number to sequence your steps: ceramic can drop you to roughly 0.5–0.8 µm, plastic brings you to 0.2–0.4 µm, organic polish can get below 0.2 µm under optimal conditions.
4. Process energy and time. High-energy centrifugal machines can accelerate cut rate dramatically, but they also consume media faster. If you’re running a single-shift operation with a vibratory bowl, a slightly softer plastic that requires 90 minutes may be more cost-effective than a hard ceramic that takes 30 minutes but forces you into an extra finishing step.
5. Cleanliness requirements. Where will the instrument end up? If it’s going into a Class II medical device pouch, you’ll need to demonstrate that no media residue remains. Plastic and organic particles are easier to detect in rinse waters than micronized ceramic dust, which can hide in crevices.
The matrix below matches common instrument categories with starting-point media recommendations. These are empirical starting points, not prescriptions. Always confirm with a small pilot batch and metrology validation.
| Instrument Category | Preferred Media Family | Suggested Shape | Typical Process | Critical Check |
|---|---|---|---|---|
| Extraction forceps | Керамика | Angle-cut triangle | Centrifugal disc, wet | Hinge joint clearance, no lodged media |
| Periodontal scalers/curettes | Plastic (fine abrasive) | Star or precision cone | Vibratory, wet | Cutting edge under 10X magnification; edge radius <15 µm |
| Implant drivers/torque wrenches | Ceramic + plastic sequence | Ball cone for ceramic, star for plastic | Centrifugal then vibratory | Internal hex integrity, no burrs |
| Orthodontic brackets/bands | Organic walnut shell | Grit (random) | Dry tumble | No residue in ligature slot; pass water-break test |
| Surgical elevators | Ceramic (pre-glaze) | Tapered cone | Vibratory, wet | Blade tip radius consistent across lot |
For a deeper method on translating instrument requirements into media specifications, including example risk assessments, the article How to Choose Abrasive Media for Dental Instrument Finishing walks through a structured selection framework you can adapt directly.
Overview of Finishing Processes Compatible with Dental Media
The best media choice can still fail if you drop it into the wrong machine. Dental finishing shops typically rely on three main process categories: vibratory finishing, centrifugal (disc or barrel) finishing, and dry tumbling. Each offers a different energy intensity and flow pattern, which directly impacts media impact force, cycle time, and the risk of part-on-part impingement.
Vibratory finishing uses an eccentric motor to vibrate a bowl or tub, causing the media-instrument mass to roll in a toroidal path. It’s the most forgiving, with relatively low contact pressure that suits delicate instruments and long slender parts. Cycle times are longer — typically 45 to 120 minutes for cut-down, and up to 4 hours for fine finishing — but the controlled action reduces the risk of nicking. I generally pair vibratory bowls with plastic media or non-aggressive ceramic shapes.
Centrifugal disc and barrel finishing generates much higher g-forces, typically 10–25 G in disc systems. This compacts the media and accelerates material removal. It’s excellent for deburring cast instruments or heavy stock removal, but the high energy demands robust ceramic media formulations that won’t fracture. Part-on-part contact is a real danger here; I use dedicated fixturing or partition plates to isolate critical surfaces. Cycle times can be as short as 15–30 minutes for rough operations, but the heat buildup requires careful compound replenishment and temperature monitoring.
Dry tumbling with organic media is purely for polishing, drying, and film removal. Without water or liquid compound, energy transfer is lower, but the absence of aqueous chemistry eliminates the risk of corrosion during processing. I use this as the final step, especially for instruments that will be immediately passivated and packaged.
Matching media to process isn’t just about energy; it’s about how the flow pattern feeds parts through the media mass. In a vibratory bowl, helical roll can stratify media by size if you’re not careful, leading to inconsistent contact. In centrifugal barrels, high rotation speed can spin out lighter media particles, starving the parts of abrasive contact. I’ve found that a media size distribution with a controlled range (e.g., 4–6 mm for dental vibratory work) reduces stratification. The dedicated guide Matching Abrasive Media to Dental Finishing Processes explores these machine-media interactions in detail with specific setup parameters.
Media Maintenance and Lifecycle Best Practices
Media that isn’t maintained degrades in two ways: it shrinks, and it glazes. Shrinkage changes the media-to-part clearance and can allow smaller media fragments to lodge in lumens or threads, creating lodged-particle defects that are costly to pick out. Glazing — a buildup of metal swarf, compound binder, and hard-water scale on the media surface — turns an abrasive into a bearing surface, drastically reducing cut rate. Regular inspection and housekeeping prevent both.
The following is the weekly checklist I have hanging by every finishing station. It’s not exhaustive, but it catches 90% of the gradual failures I’ve seen.
| Check | Frequency | What to Look For | Corrective Action |
|---|---|---|---|
| Size screening | Weekly | Media particles smaller than 60% of original nominal size | Screen out undersized particles; top up with fresh media to maintain media-to-part ratio |
| Surface glazing | Every cycle | Shiny, smooth surfaces on ceramic or plastic; no abrasive “bite” to touch | Perform pre-cycle compound wash; replace charge if glazing persists |
| Compound residue | Daily | Sticky or gummy media surfaces, discoloration | Run cleaning cycle with approved media cleaner; verify rinse water clarity |
| Water chemistry | Weekly | pH outside 6.5–8.5 in process water; hardness increase | Adjust water treatment; check compound compatibility |
| Cross-contamination | Before charge change | Mixed media types (e.g., ceramic fragments in plastic charge) | Complete discharge, manual separation, re-screen; consider dedicated equipment |
| Media level | Daily | Media level below 80% of original fill line | Top up with same formulation; record addition and date |
I generally replace a ceramic charge when more than 20% of the media has fallen below the minimum size threshold, which typically happens after 400–600 operating hours in aggressive centrifugal service, or longer in vibratory use. Plastic media tends to degrade faster — 250–400 hours in vibratory bowls, depending on compound acidity. Organic media, as mentioned, follows a schedule based on odor and compaction rather than size reduction. For a full breakdown of maintenance procedures, hazard points, and how to extend media life without sacrificing finish quality, read Maintain and Extend Abrasive Media Life in Dental Finishing.
Stop-processing rule: If you observe a sudden increase in Ra variation by more than 30% between instruments in the same batch, check media size distribution and compound flow rate before adjusting cycle time. I’ve resolved more erratic finish complaints by replacing worn media than by tweaking any other parameter.
Frequently Asked Questions About Dental Abrasive Media
Can abrasive media cause contamination on dental instruments?
Yes. Residual media fragments, especially crushed ceramic dust or plastic fines, can embed in softer stainless surfaces under high-pressure contact. This residue can become a nucleation site for pitting corrosion after sterilization. The best prevention is a rigorous post-process cleaning protocol: a multi-stage rinse (often with ultrasonics), followed by a visual inspection at 10X magnification, and periodic surface chemistry verification using energy-dispersive X-ray spectroscopy (EDS) on a sample basis.
How often should I replace the abrasive media completely?
There’s no universal hour meter. My practice is to monitor size degradation and cut-rate drift. When a ceramic charge has lost more than 20–25% of its original average particle mass and the cycle time to achieve the same Ra has increased by 30% or more, I replace it. For organic media, I discard when it no longer produces a consistent luster in the expected time, or when it develops an odor indicating microbial growth from absorbed organic compounds.
Can I mix two types of media in one process?
I avoid it unless there’s a validated, documented reason. Mixing ceramic with plastic, for instance, creates unpredictable specific gravity distribution in the bowl and can lead to stratification, with heavy ceramic sinking to the bottom and lighter plastic floating — causing uneven finishing. If you need both cut and polish actions, use a sequential two-step process with separate media charges.
What’s the right compound-to-media ratio?
For wet vibratory and centrifugal processes, I start with a compound concentration of 3–5% by volume in the water flow, then adjust based on foam height in the bowl. Too much foam? Reduce compound and increase flow rate. No foam at all? The compound might be depleted or the flow too high. In a typical 100-liter vibratory bowl processing dental forceps, that translates to a compound flow of roughly 200–400 ml per hour metered continuously — but always verify against your compound manufacturer’s chart for your specific media and water hardness.
How do I know if the media is too aggressive for my instrument?
Measure the critical edge radius before and after one full cycle. On a scaler cutting edge, if the radius increases by more than 5 µm in a single processing step, the media is too aggressive or the time too long. Another quick field check: run a polished coupon of the same alloy through the cycle and examine under 20X; if new, deep directional scratches appear, the media needs to be stepped down or the compound needs to be changed to a finer grit.
Does media shape really make a difference on dental instruments?
Absolutely. A flat triangular media tends to contact planar surfaces well but can miss concave areas on a perio scaler shank. A precision cone or star shape reaches into the radiused transitions typical of dental instruments. I’ve seen a simple shape change reduce hand-deburring rework time by 40% on a batch of implant locator abutments, simply because the media could access the undercut area that flat shapes couldn’t reach.
Final Practical Checklist Before Your Next Media Order
I’ll leave you with the same list I give to finishing technicians who are about to order or change media for a dental product line. Run through these seven items and you’ll catch the most common failure modes before they hit production.
- Instrument drawing review: Identify the minimum internal radius and critical edges. Confirm max media size against that number.
- Alloy verification: Match media hardness to the alloy and heat-treatment condition. Test coupon if in doubt.
- Target Ra measurement: Have a metrology reference for the final surface. Don’t rely on visual “satin” alone.
- Process sequence mapped: Decide if one media type suffices or if you need a ceramic → plastic → organic chain.
- Equipment energy rating: Verify that the planned media density is compatible with the machine’s g-force output.
- Compound compatibility: Request a compound recommendation chart for your specific media and water quality.
- Maintenance schedule drafted: Integrate the weekly media checks from this guide into your work instructions or TPM board.
Фильтры