Pre-Coating Surface Preparation for 3D Printed Parts: Blasting Before Paint, Powder Coat, and PVD
Every coating system applied to a 3D printed part — from basic spray primer to high-performance PVD hard coating — depends critically on the surface preparation performed before the coating is applied. As-built AM surfaces, whether from FDM, SLS, or metal powder bed fusion, are incompatible with most coating systems: they are too rough and textured at the macro scale, carry contamination from the AM process (oxides, oils, loosely adherent powder), and lack the controlled micro-anchor profile that most coating systems require for adhesion. Abrasive blasting is the universal solution: in a single operation, it cleans the surface, removes as-built contamination, and creates a controlled surface profile that provides the mechanical interlocking needed for durable coating adhesion. This guide covers pre-coating blast protocols for all major coating types applied to AM parts.
1. Why Coating Adhesion Fails on As-Built AM Parts
Coating adhesion requires two conditions to be met simultaneously: chemical compatibility between the coating and substrate, and a surface profile that provides mechanical interlocking. As-built AM surfaces fail both conditions:
- Surface contamination: As-built metal AM surfaces carry a non-uniform oxide layer formed during the laser process, plus loosely adherent partially melted powder particles, and residual build-chamber atmosphere gases adsorbed at the surface. Polymer AM surfaces (FDM, SLS) carry mould release residues, layer-line-trapped oils from the build process, and static-charge-attracted dust. Any coating applied over these contamination layers bonds to the contamination layer, not to the base material — and fails when the contamination layer fails.
- Wrong anchor profile: As-built AM surfaces have the wrong kind of surface texture for most coatings. The large-scale layer-line ridges of FDM (Ra 10–25 µm at the ridge scale) are too coarse and directional for paint adhesion. The granular texture of SLS nylon is irregular and non-uniform. Metal AM surfaces have varying Ra by orientation. Blasting replaces these process-inherent textures with a controlled, uniform, isotropic micro-roughness calibrated to the specific coating system’s adhesion requirements.
- Porosity exposure: AM parts — particularly metal SLM parts — may contain micro-porosity at or near the surface. As-built pores trap and release moisture and process gases during coating cure, creating blistering and delamination. Blasting partially closes surface-connected porosity through the peening action of spherical media, reducing outgassing during coating cure.
2. What Abrasive Blasting Achieves for Coating Adhesion
A single blast cycle on an AM part simultaneously delivers:
- Очистка поверхности: Removes the as-built oxide layer, loosely adherent powder, adsorbed gases, and surface oils — providing a chemically fresh substrate surface for the coating to bond to.
- Controlled anchor profile: Creates a uniform micro-roughness at the Ra level required by the specific coating system — 2–5 µm for paint, 3–7 µm for powder coat, 6–12 µm for thermal spray — providing the mechanical interlocking that gives the coating adhesion strength.
- Surface activation: The newly exposed metal surface is in a high-energy, chemically reactive state that promotes bonding with primers and coatings — provided coating is applied within the coating window.
- Surface uniformity: Normalises the as-built Ra variation between different surface orientations, providing a consistent starting condition for the coating system across all faces of the part.
These four functions explain why proper pre-blast surface preparation consistently improves coating adhesion strength (pull-off test per ASTM D4541) by 50–150% compared to coating applied to as-built or manually cleaned AM surfaces.
3. Blasting Before Liquid Paint and Epoxy Primers
Liquid painting — spray-applied epoxy primers, polyurethane topcoats, and multi-component industrial coatings — is the most common coating applied to both metal and polymer AM parts. The surface preparation specification for most industrial liquid paint systems on metal AM is equivalent to SSPC-SP6 (Commercial Blast Clean) or ISO 8501-1 Sa 2:
- Ra 2.5–5 µm (ASTM D4417, Method B or C)
- Cleaned to remove all oil, dust, loosely adherent scale, and rust
- Colour: uniform matte grey/silver on metal; uniform matte on polymers
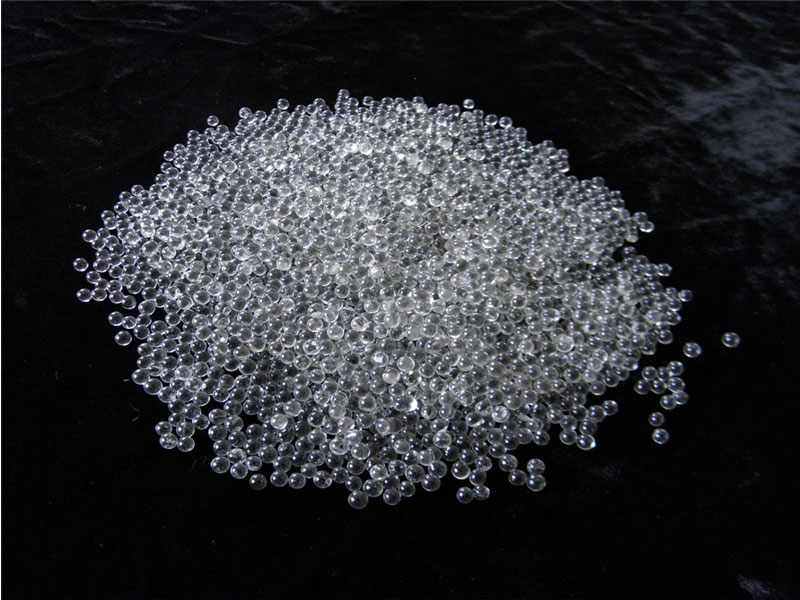
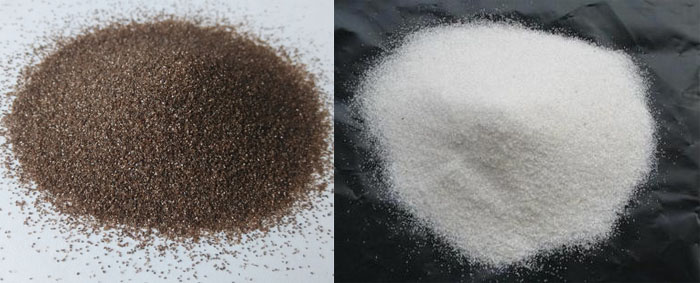
For metal AM parts, Al₂O₃ grit (80–120 mesh) or glass beads (100–150 mesh) at 50–75 psi achieves the Sa 2 cleanliness and Ra 2.5–5 µm profile simultaneously. For polymer AM parts (FDM, SLS, MJF), glass beads (150–200 mesh) at 35–50 psi creates the required micro-anchor profile and normalised matte surface for primer adhesion.
Application timing: apply liquid primer within 4 hours of blasting on metal parts (2 hours in high humidity). For polymer AM parts, moisture uptake is the primary risk — coat promptly and avoid high-humidity storage of blasted parts before coating.
Zinc-rich primers (for steel AM parts requiring cathodic protection) require more aggressive surface preparation: SSPC-SP10 (Near White Blast), equivalent to ISO 8501-1 Sa 2.5, with Ra 50–85 µm (2–3 mil). This requires coarser Al₂O₃ 60–80 mesh at 70–90 psi for steel AM parts.
4. Blasting Before Powder Coat
Powder coating — thermosetting polymer powder applied electrostatically then oven-cured — is widely used on AM parts for industrial housings, brackets, consumer products, and architectural components. Powder coat requires a somewhat rougher anchor profile than liquid paint: Ra 3–7 µm is the typical specification for metal AM parts before powder coat.
Process protocol for metal AM powder coat preparation:
- Glass beads or Al₂O₃ blast to Ra 3–6 µm
- Apply conversion coating (chromate, Ti-Zr, or zinc phosphate — see FAQ section) to improve conductivity for electrostatic application and provide additional adhesion
- Apply powder coat electrostatically (15–100 µm film thickness)
- Cure in oven at 160–200°C per powder manufacturer’s specification
A critical issue specific to AM parts in powder coat applications is outgassing: sub-surface porosity in SLM metal AM parts releases trapped gases during the oven cure cycle (160–200°C), creating pinholes, craters, or blisters in the cured powder coat film. Pre-bake the part at 110–130°C for 30–60 minutes before applying powder coat to drive out moisture and gases. This pre-bake step is standard practice for powder coating of AM parts in professional production environments.
5. Blasting Before PVD and CVD Coatings
Physical Vapour Deposition (PVD) and Chemical Vapour Deposition (CVD) coatings are thin (1–10 µm), hard, wear-resistant coatings applied to cutting tools, mould inserts, and precision components. AM parts for tooling applications — conformal cooling inserts, mould cavities, cutting tool bodies — increasingly receive PVD coatings (TiAlN, AlCrN, DLC) after AM build.
PVD pre-blast protocol for AM parts:
- PVD requires a very smooth substrate: Ra ≤ 0.3–1.0 µm (specified by the coating supplier)
- Blasting alone cannot achieve this Ra from an as-built AM surface — it is used as a preliminary cleaning and normalisation step
- Workflow: blast (glass beads 150–200 mesh at 55–70 psi) → electropolish or mechanical polish to target Ra → ultrasonic clean in suitable solvent → PVD coating
- For AM tooling steel (H13, M2, 1.2343), the blasting removes the as-built oxide scale, and electropolishing brings the surface to Ra ≤ 0.5 µm for PVD
The PVD chamber environment (high vacuum at 10⁻³ to 10⁻⁵ Pa) is incompatible with any surface contamination that can outgas — oils, trapped gases from porosity, adsorbed moisture, or surface media residue from blasting. Thorough cleaning after blasting (alkaline clean + ultrasonic + DI water rinse + nitrogen purge) is mandatory before PVD.
6. Blasting Before Thermal Spray
Thermal spray coatings — including plasma spray (ceramic TBCs for aerospace), HVOF (high-velocity oxy-fuel metallic coatings for wear and corrosion), and flame spray — require the most aggressive anchor profile of any common AM coating system. Thermal spray particles impact the substrate at high velocity and bond by mechanical interlocking with the surface asperities; the deeper the anchor profile, the stronger the mechanical bond.
Standard thermal spray surface preparation for AM parts:
- Aluminum oxide 36–60 mesh at 70–100 psi to create Ra 6–12 µm (Rz 40–80 µm) anchor profile
- SSPC-SP5 (White Metal Blast) or ISO 8501-1 Sa 3 cleanliness is often specified for thermal spray substrates
- Apply thermal spray within 2 hours of blasting — the activated surface oxidises rapidly, and thermal spray adhesion falls sharply if more than 4 hours elapse
- Handle with clean gloves only — fingerprint oils on a blasted surface will cause local adhesion failure under the thermal spray deposit
7. Blasting Before Adhesive Bonding
Structural adhesive bonding (epoxy, acrylic, polyurethane adhesives) of AM parts to other components requires surface preparation equivalent to painting: Ra 3–5 µm, free of oils and oxides. Glass bead blasting (100–150 mesh) at 45–65 psi is appropriate for metal AM parts before structural bonding. For polymer AM parts, glass beads at 35–45 psi provide the micro-anchor needed for epoxy adhesive.
For titanium-to-titanium or titanium-to-composite bonds (aerospace structures), blasting is followed by a chemical priming step: phosphoric acid anodising (PAA) or grit-blast/silane primer per the applicable aerospace bonding specification. These processes rely on the freshly blasted surface as their starting condition.
8. The Coating Window: Timing After Blasting
The coating window is the maximum elapsed time between blast completion and coating application within which the blasted surface retains adequate adhesion capability. Outside this window, surface re-oxidation and contamination degrade adhesion.
| AM Material | Coating Window | High Humidity (≥85% RH) | Notes |
|---|---|---|---|
| Carbon / alloy steel AM | 4 hours | 2 hours | Apply primer before rust bloom appears |
| Stainless steel 316L | 2 hours | 1 hour | Passivation or coating promptly |
| Titanium Ti-6Al-4V | 1–2 hours | 1 hour | Passivates rapidly; coat or convert promptly |
| Aluminum AlSi10Mg | 4 hours (after alkaline clean) | 2 hours | Complete post-blast clean first |
| FDM / SLS / MJF polymers | 24 hours | 8 hours | Dust and moisture uptake main risks |
| Thermal spray (all metals) | 2 hours | 1 hour | Strictest window; mechanical bond depends on fresh surface |
9. Media Selection by Coating Type and AM Material
| Coating System | AM Material | Recommended Media | Target Ra (µm) | Standard |
|---|---|---|---|---|
| Liquid paint / epoxy primer | Metal AM (not Ti/SS) | Al₂O₃ 80–120 mesh | 2.5–5 | SSPC-SP6 / Sa 2 |
| Liquid paint / epoxy primer | Ti, SS AM | Glass beads 100–150 mesh | 2.5–5 | SSPC-SP6 / Sa 2 |
| Liquid paint | FDM/SLS polymer | Glass beads 150–200 mesh | 2–4 | Visual + adhesion test |
| Powder coat | Metal AM (AlSi10Mg) | Glass beads then conversion | 3–6 | Supplier spec |
| Powder coat | Steel AM | Al₂O₃ 80–120 mesh | 3–7 | Supplier spec |
| Thermal spray (ceramic/HVOF) | All metals | Al₂O₃ 36–60 mesh | 6–12 | SSPC-SP5 / Sa 3 |
| PVD (TiAlN, DLC) | Tool steel AM | Glass beads → then polish | ≤0.5 (post-polish) | PVD supplier spec |
| Structural adhesive | Metal AM | Glass beads 100–150 mesh | 3–5 | Adhesive supplier spec |
For surface roughness measurement details relevant to coating preparation, see: Improving Ra and Rz on 3D Printed Parts: How Abrasive Blasting Reduces Surface Roughness. For the complete media selection guide comparing glass beads, Al₂O₃, and steel shot for all AM applications, see: Blasting Media for 3D Printed Parts: Glass Beads vs Aluminum Oxide vs Steel Shot — Selection Guide.
Часто задаваемые вопросы
How quickly must I coat an AM part after blasting?
The coating window after blasting — the maximum allowable time between blast completion and coating application — is determined by how rapidly the freshly cleaned surface re-oxidises in ambient air. Guidelines: carbon steel and alloy steel: coat within 4 hours (2 hours above 85% relative humidity); stainless steel: passivation or coating within 2 hours; titanium: coating or conversion coating within 1–2 hours; aluminum: conversion coating or primer within 4 hours of alkaline clean; polymer AM parts (FDM, SLS, MJF): no strict window as polymers do not oxidise — coat within 24 hours before dust accumulation affects adhesion. For critical aerospace and industrial coatings, the specification often defines the maximum window; always follow the coating system manufacturer’s recommendation if it is more stringent than the values above.
What surface profile (anchor pattern) is needed for different coating types?
The anchor pattern requirements for common AM coating systems: liquid paint (epoxy, polyurethane): Ra 2–5 µm, equivalent to SSPC-SP6 / ISO 8501-1 Sa 2; powder coat: Ra 3–7 µm; zinc-rich primer (for steel AM): Ra 3–6 µm per SSPC-SP10 (Near White Blast); thermal spray (ceramic or cermet): Ra 6–12 µm, achieved with coarse Al₂O₃ 36–60 grit; adhesive bonding: Ra 3–6 µm for most structural adhesives (Loctite, 3M); PVD/CVD: Ra 0.3–1.0 µm — requires blasting followed by electropolishing to reach this range. The coating manufacturer’s surface preparation specification always takes precedence over generic guidelines when both are available.
Can I powder coat SLM aluminum (AlSi10Mg) directly after blasting?
Powder coating blasted AlSi10Mg is feasible but requires an intermediate step: a chromate conversion coating (MIL-C-5541, also known as Alodine or Iridite), zinc phosphate, or Ti-Zr (titanium-zirconium) conversion coating must be applied between the blast and the powder coat. The reason is that powder coating uses electrostatic particle attraction, which requires the substrate to be sufficiently conductive. Raw blasted aluminum has its native oxide layer, which is insufficiently conductive for good powder adhesion. Conversion coating replaces the native oxide with a conductive chemical conversion layer. After conversion coating and within the specified coating window (typically 4–8 hours), apply powder coat and cure at 160–200°C. The cured powder coat on blasted + conversion-coated AlSi10Mg has excellent adhesion, typically >5 MPa pull-off strength.
Why does coating sometimes peel from SLM parts despite blasting before application?
Coating adhesion failure on blasted AM parts is most commonly caused by one of four issues: (1) Contamination after blasting — fingerprints, oils, or airborne dust settling on the blasted surface before coating. Handle blasted parts with clean cotton gloves and coat as promptly as possible. (2) Exceeding the coating window — the surface re-oxidises and loses the chemically active state that promotes adhesion. (3) Outgassing — AM parts with residual porosity can outgas during high-temperature coating cure (oven cure for powder coat, thermal spray) if moisture or process gases are trapped in sub-surface pores. Pre-bake the part at 100–120°C for 30–60 minutes before coating to drive off moisture from pores. (4) Insufficient or wrong surface profile — if the anchor Ra is too low for the specific coating, adhesion will be inadequate even on a chemically clean surface. Verify that the blast-produced Ra matches the coating specification requirements.
Is blasting before PVD coating different from blasting for paint?
Yes — PVD (Physical Vapour Deposition) coating requires a fundamentally different surface preparation from paint or powder coat. PVD is applied in a high-vacuum chamber and creates a very thin (1–5 µm) hard coating. Because PVD coatings are thin, they conform closely to the substrate surface and cannot bridge or fill surface defects. The requirements for PVD substrate preparation are: (1) Ra ≤ 0.3–1.0 µm (specified by the PVD coating supplier) — far smoother than paint prep. (2) Absolute freedom from contamination (the PVD chamber cannot tolerate oils, oxides, or embedded particles that would outgas under vacuum). (3) No residual blast media. The workflow for AM parts before PVD: blast with glass beads (normalise surface and remove as-built oxide) → electropolish or mechanical polish to target Ra → ultrasonic clean → PVD coating. Blasting serves as the preliminary cleaning and normalisation step; the fine surface finish is achieved by the post-blast polishing stage.
What conversion coating is best for 3D printed aluminum before powder coating?
Three conversion coating types are commonly used for AM aluminum (AlSi10Mg) before powder coating: (1) Chromate conversion (MIL-C-5541): Best corrosion resistance and conductivity; however, hexavalent chromium (Cr(VI)) is restricted under EU REACH and RoHS regulations. Use trivalent chromate (Cr(III)) formulations (Alodine 5200 or equivalent) for RoHS compliance. (2) Titanium-zirconium (Ti-Zr): RoHS-compliant, good adhesion, moderate corrosion resistance. Widely used in automotive and consumer applications. Lower corrosion resistance than chromate for harsh environments. (3) Zinc phosphate: Excellent mechanical adhesion and corrosion inhibition; heavier conversion layer than Ti-Zr; requires more controlled bath chemistry. Choose based on the corrosion environment, regulatory requirements, and powder coat supplier’s specified pre-treatment system.
Source Pre-Coating Blast Media for AM Parts
Jiangsu Henglihong Technology Co., Ltd. manufactures glass beads and aluminum oxide in mesh sizes optimised for pre-coating surface preparation across all AM materials and coating systems. Our team can advise on anchor profile targets, media selection, and coating window management for your specific application.
Contact Our Technical TeamPublished July 2026 by Jiangsu Henglihong Technology Co., Ltd. — Specialists in industrial abrasive blasting media for additive manufacturing post-processing.
Фильтры